Uncategorized
Work With Us!
Graphic Designer
We have never been able to find a good affordable designer. If you’re a designer that would be interested in working with us on a project by project basis, please submit some examples of your work, and let us know your rate. We could use help on a wide range of projects from web design, to logo creation, to the overall branding. I’d love to find a jack of all trades who could be our go-to designer for all of the crazy ideas we dream up in the future.
I really like this company’s style of design, so if you have a similar style, you may be a good fit.
Video Editor
We film over an hour of video footage almost every day. We could always use extra help editing. Do you want to help us edit our YouTube videos? Could you create 30-60 highly edited cut down videos for Instagram? Let us know how you could help and submit some examples of your work.
E-book Editor
This is a one-time design gig. I wrote a 100-page e-book on travel hacking. It’s currently in a word document. I want to release it as a PDF with clean design and graphics that help illustrate strategies explained the book. If you’re interested in turning my ugly word document into a beautifully designed PDF, please submit examples of your past work, and let us know how much you would charge at the link below.
Travel Hacking Writer
We are always looking to create more content to help others travel cheaper. If you’re an expert travel hacker, and you’d be interested in writing a blog post or longer form guide, we’d love to hear from you!
Here’s how it works: I’m not looking for someone to write blogs and guides that I tell them to write. Instead, I’m looking for content ideas and someone who can create the content. You pitch me an idea for a project, let me know how much you would charge, and if I like it, I’ll hire you to bring the project to life.
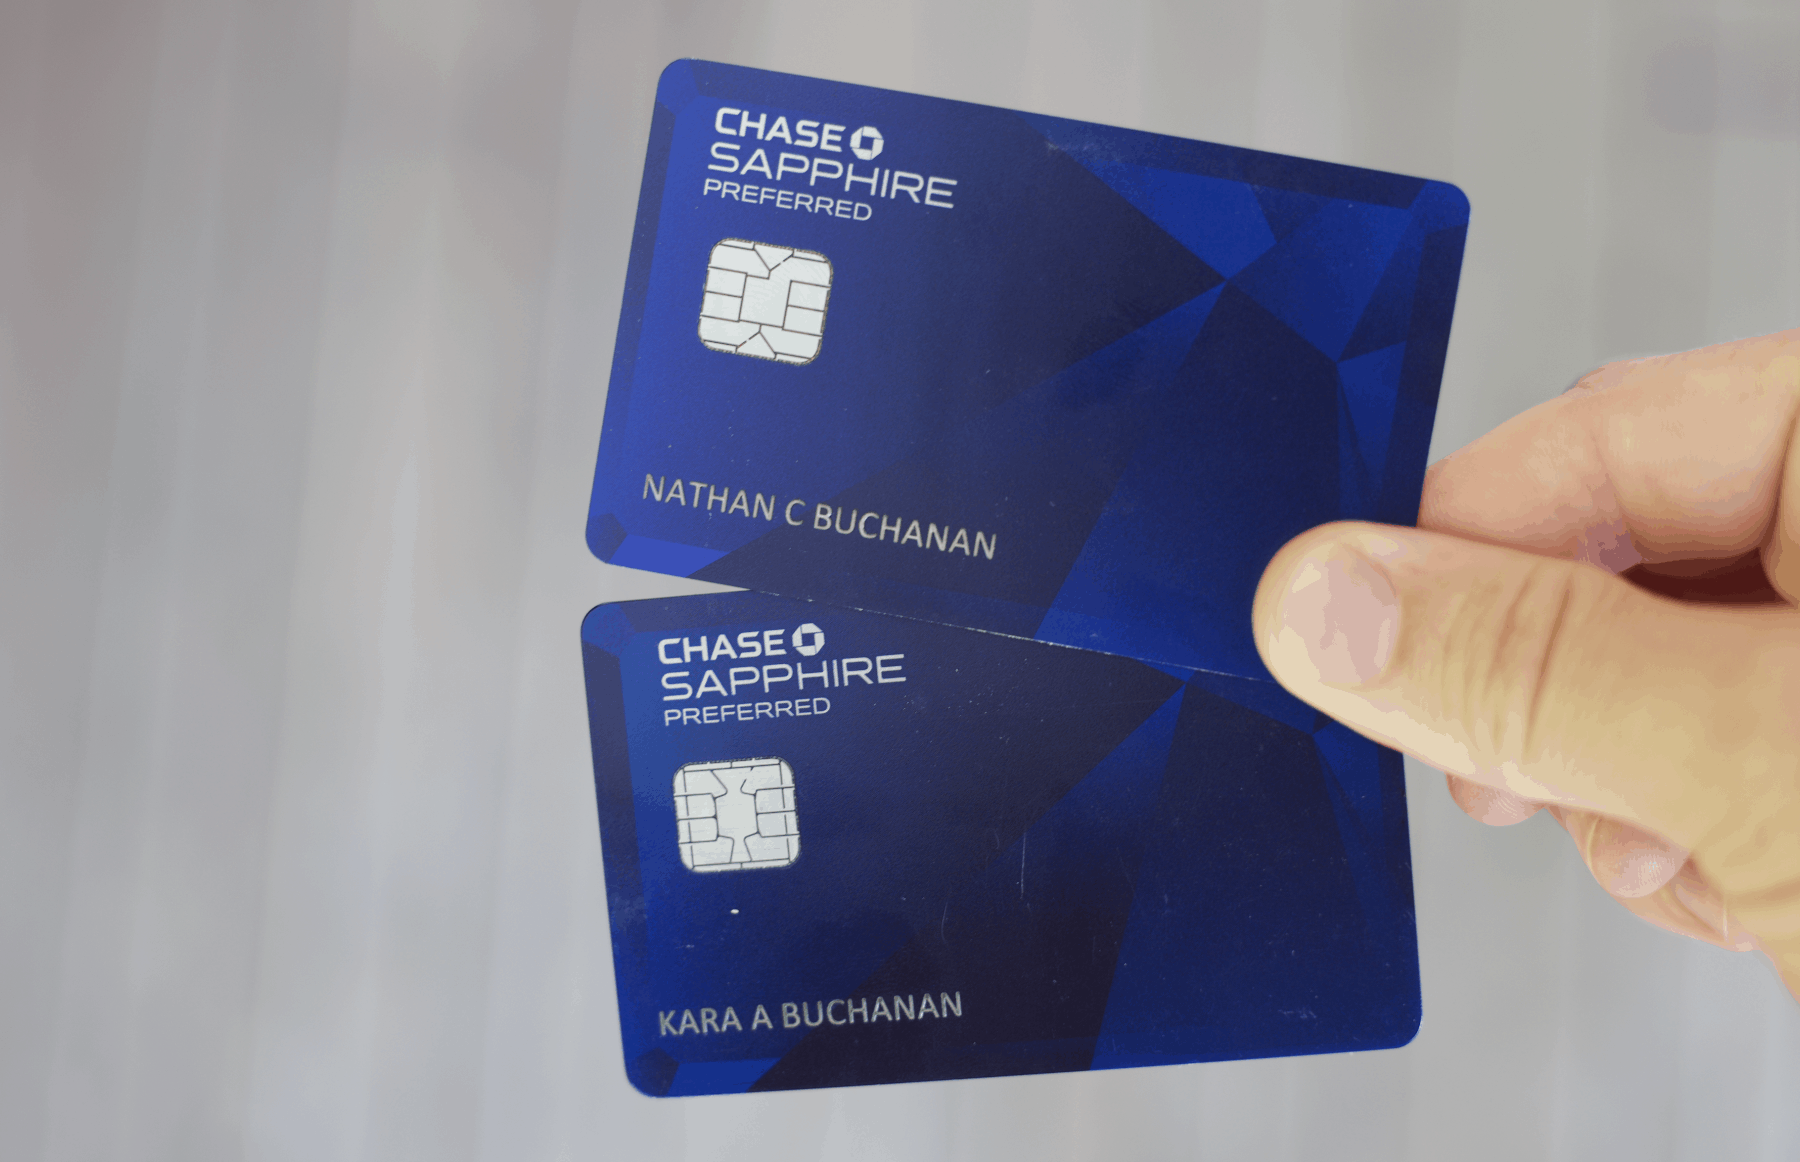
It could be anything, like a simple blog post, for example: Chase just released a new credit card, I can write a blog to tell people everything they need to know about the travel benefits offered by this new card.
Or a long form guide, for example: I would like to create a 20 page PDF guide that shows people all of the ways they can use miles and points to travel to Europe, and in the guide, I will highlight sweet spots from little known frequent flyer programs that will help people save tons of points when booking flights to Europe.
Pitch Us A New Idea!
The more details you can share, the more likely we’ll to get back to you. For example, if you wanted to create a new intro for our YouTube videos. Explain the idea for the intro in as much detail as possible. Tell us how long it would take you. Send us examples of your work. Let us know what you need from us to make it happen. What would the next steps be if we decide to move forward? How much you would charge?
Here are a few examples:
I could create an epic intro for your YouTube videos that could be customized for each new country you visit.
I could create custom animations and animated maps for your videos that would make them stand out from all of the other travel videos on YouTube.
I’m a programmer, and I have an idea for an app that would revolutionize the way people travel. Let’s start a business together.
I make beautiful hand-made coffee cups, we should put your logo on them and sell them together.
I am a real estate developer. Let’s start a chain of Kara and Nate boutique hotels in your favorite destinations.
I work for the travel channel, I’d love to talk to you about hosting your own show.
It could be ANYTHING!
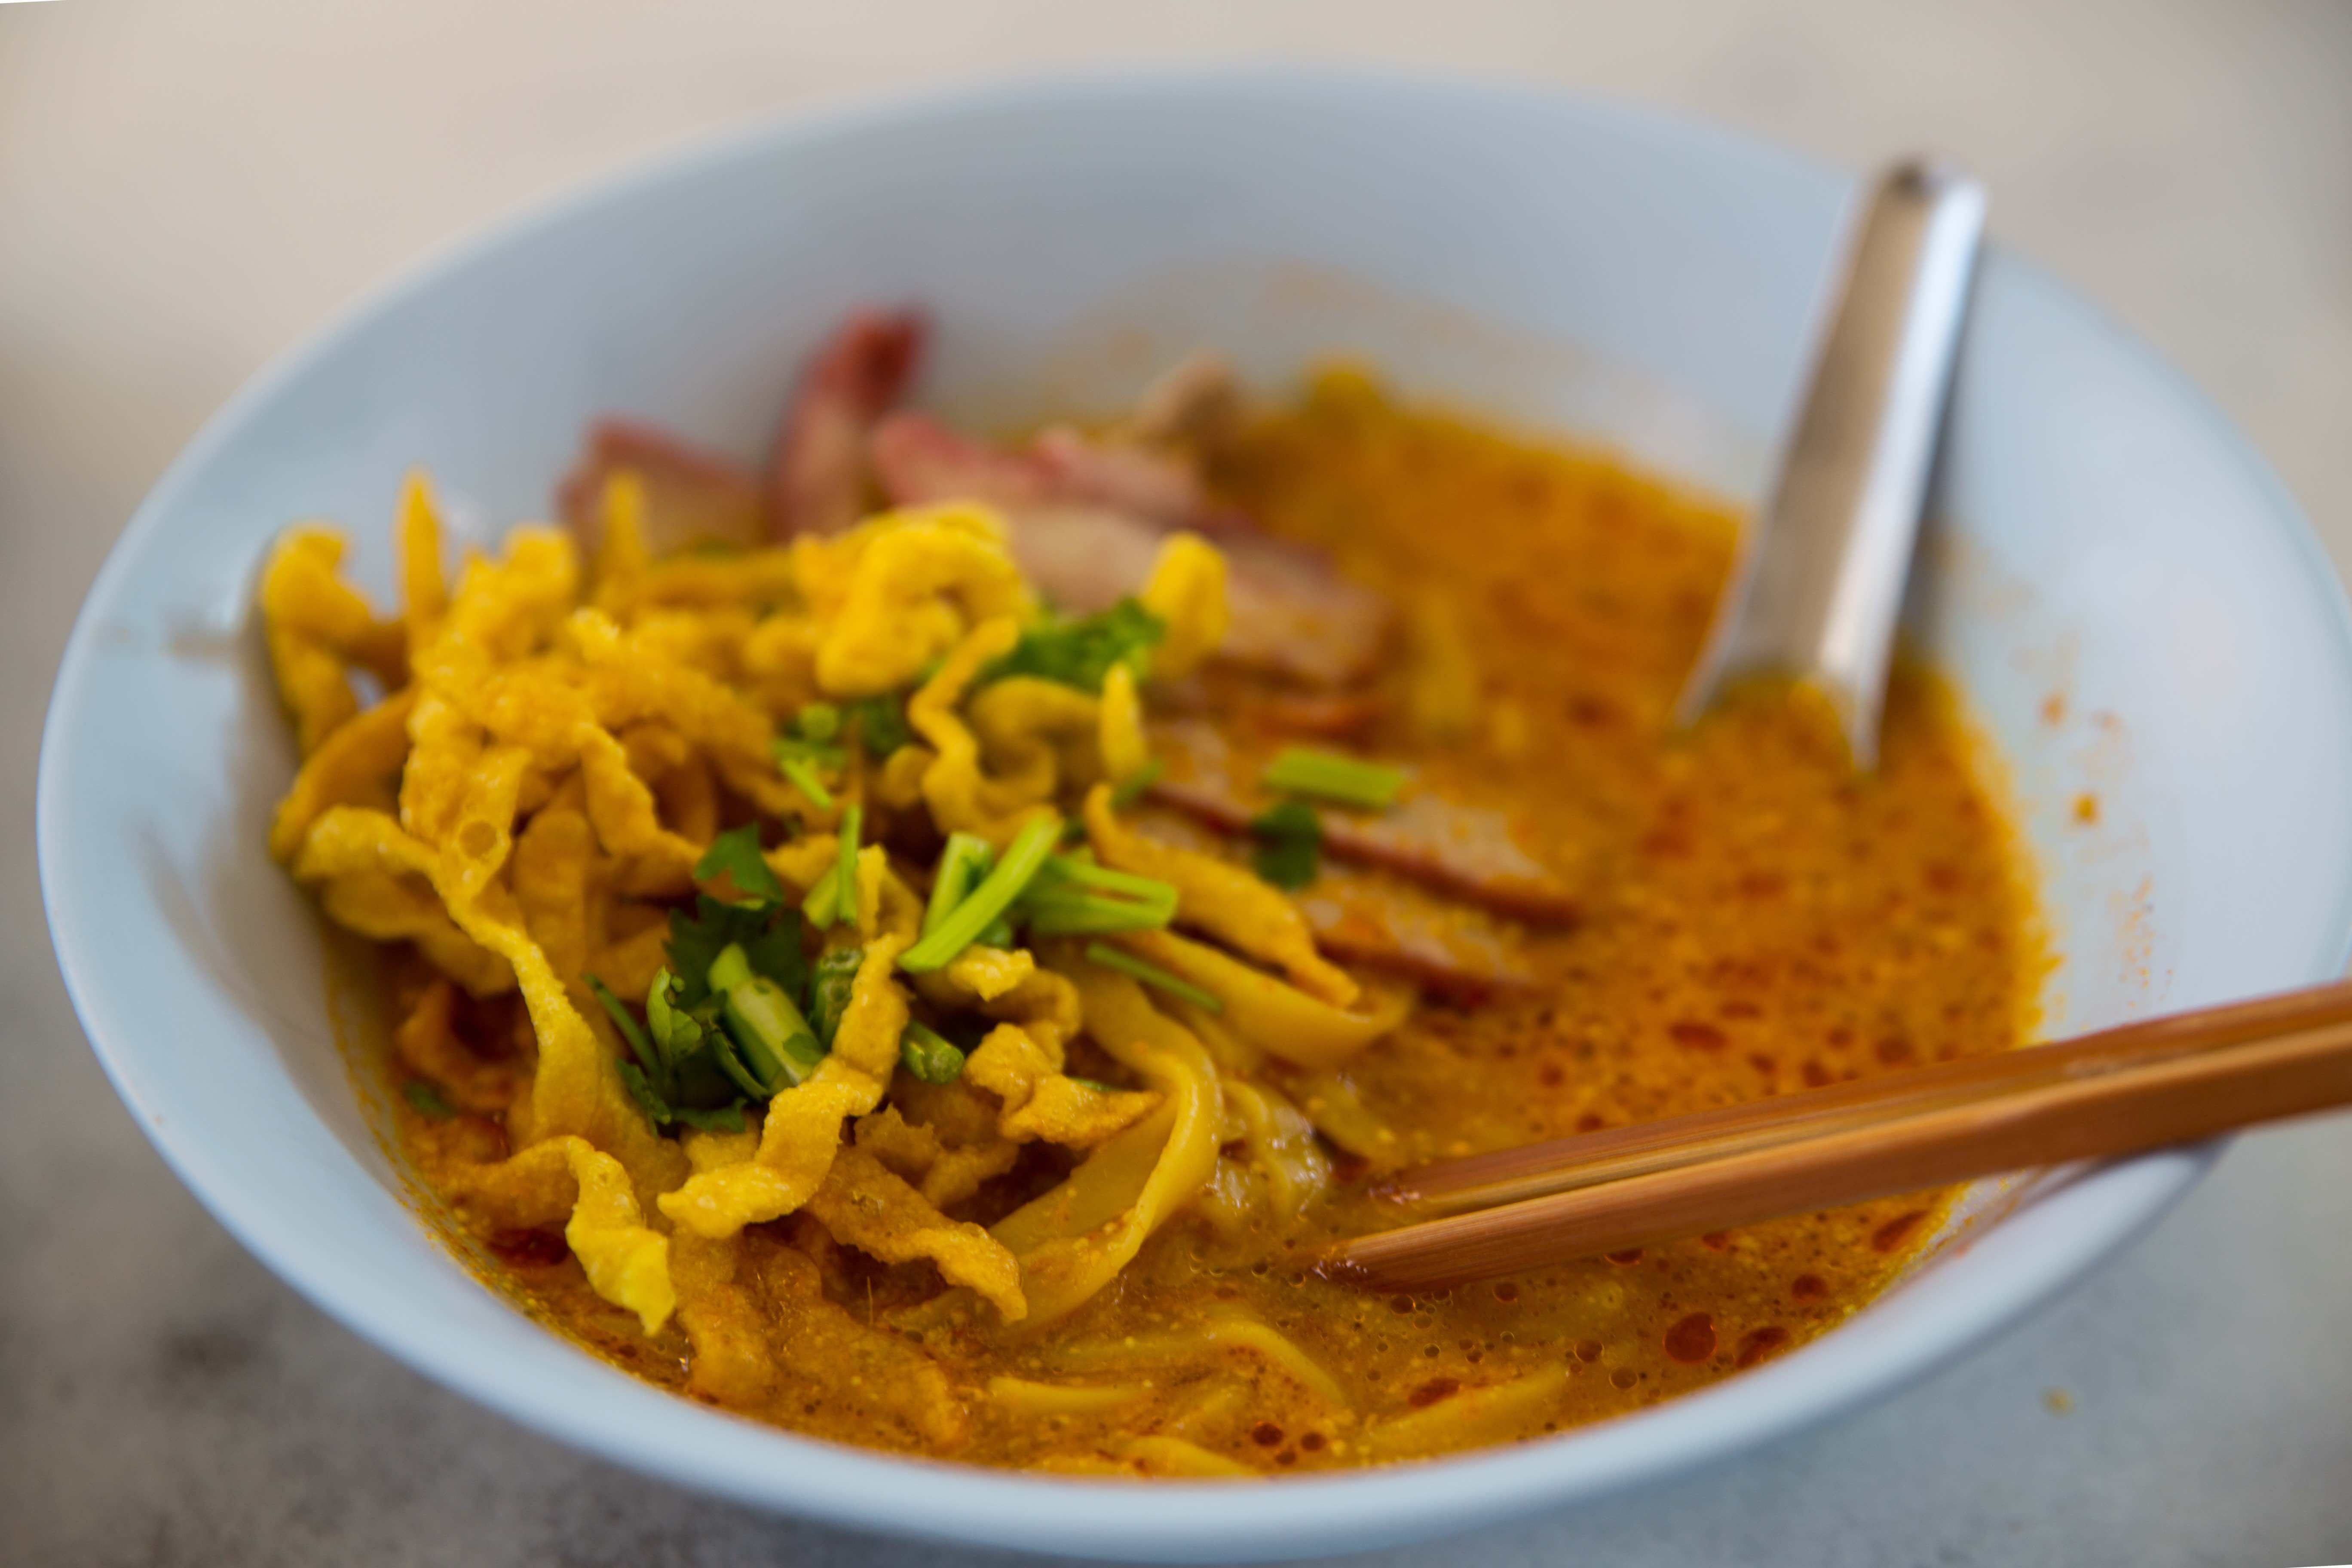
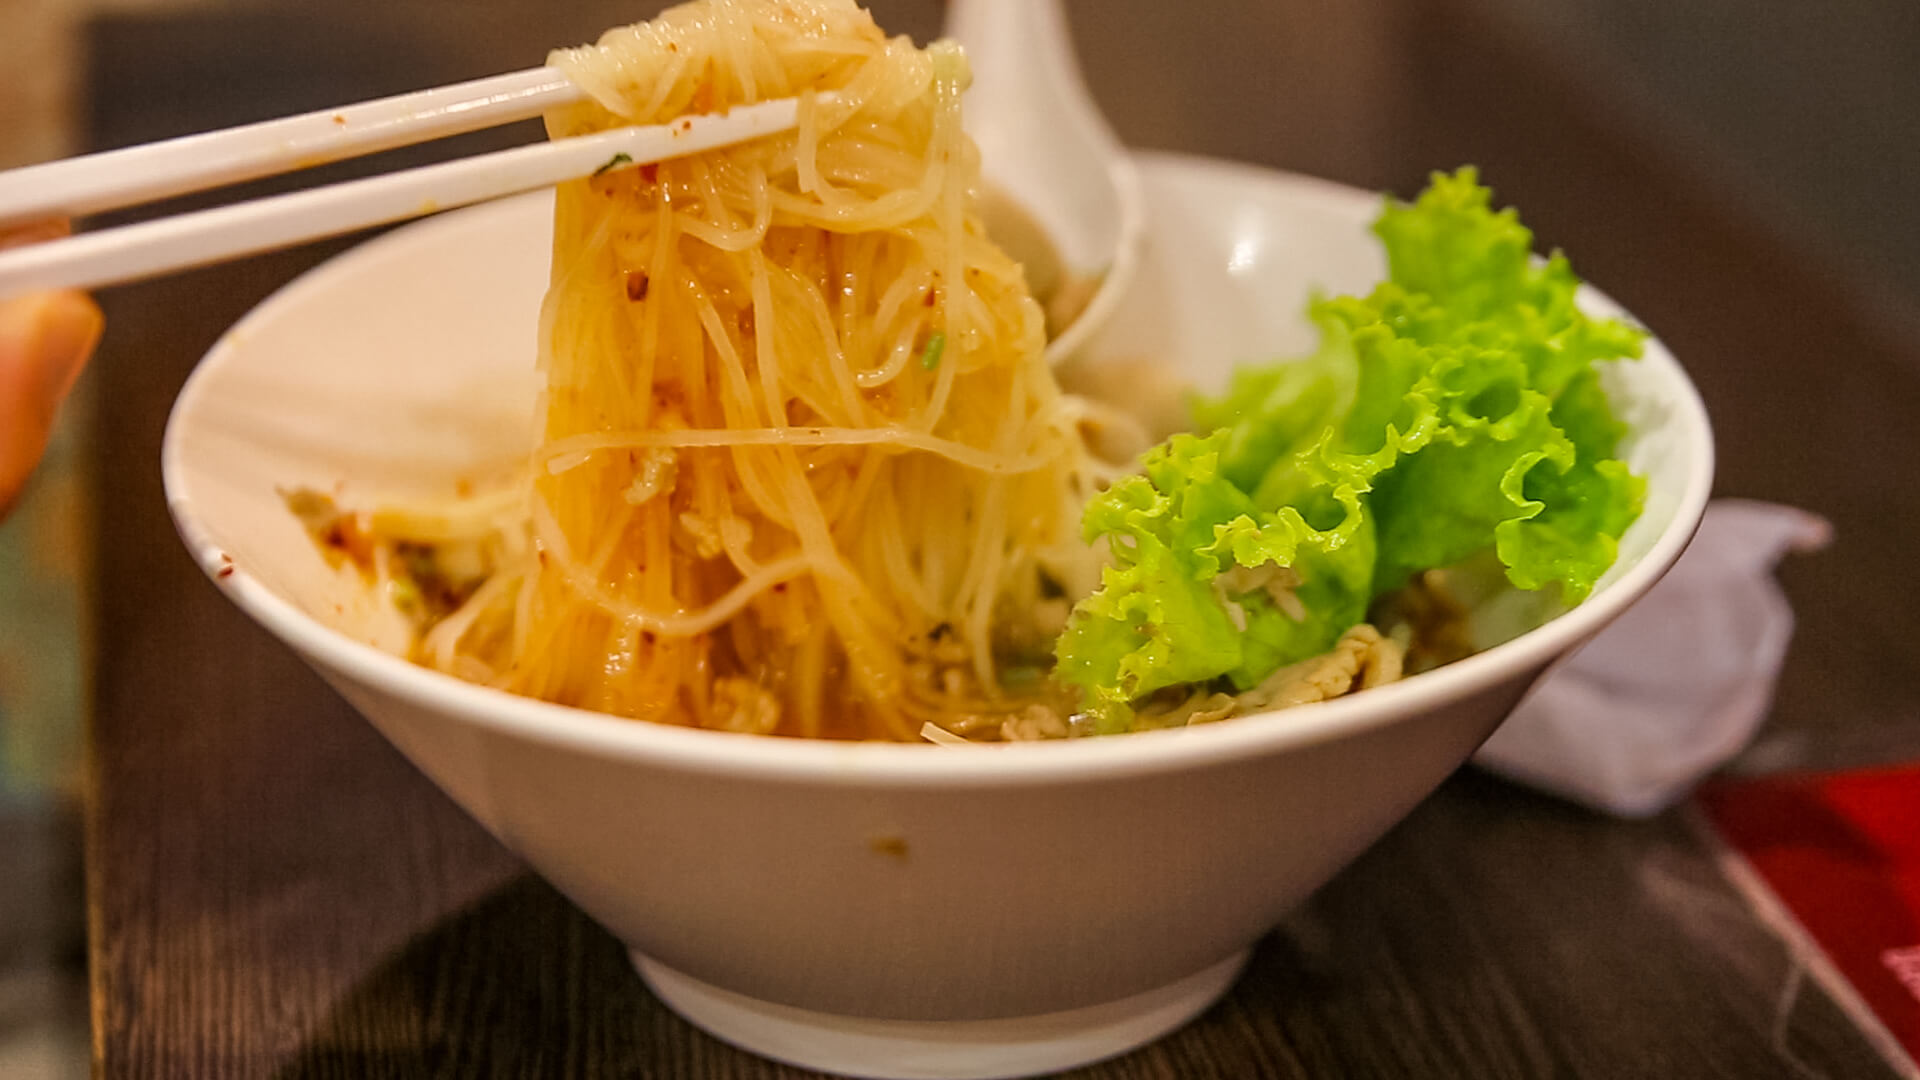
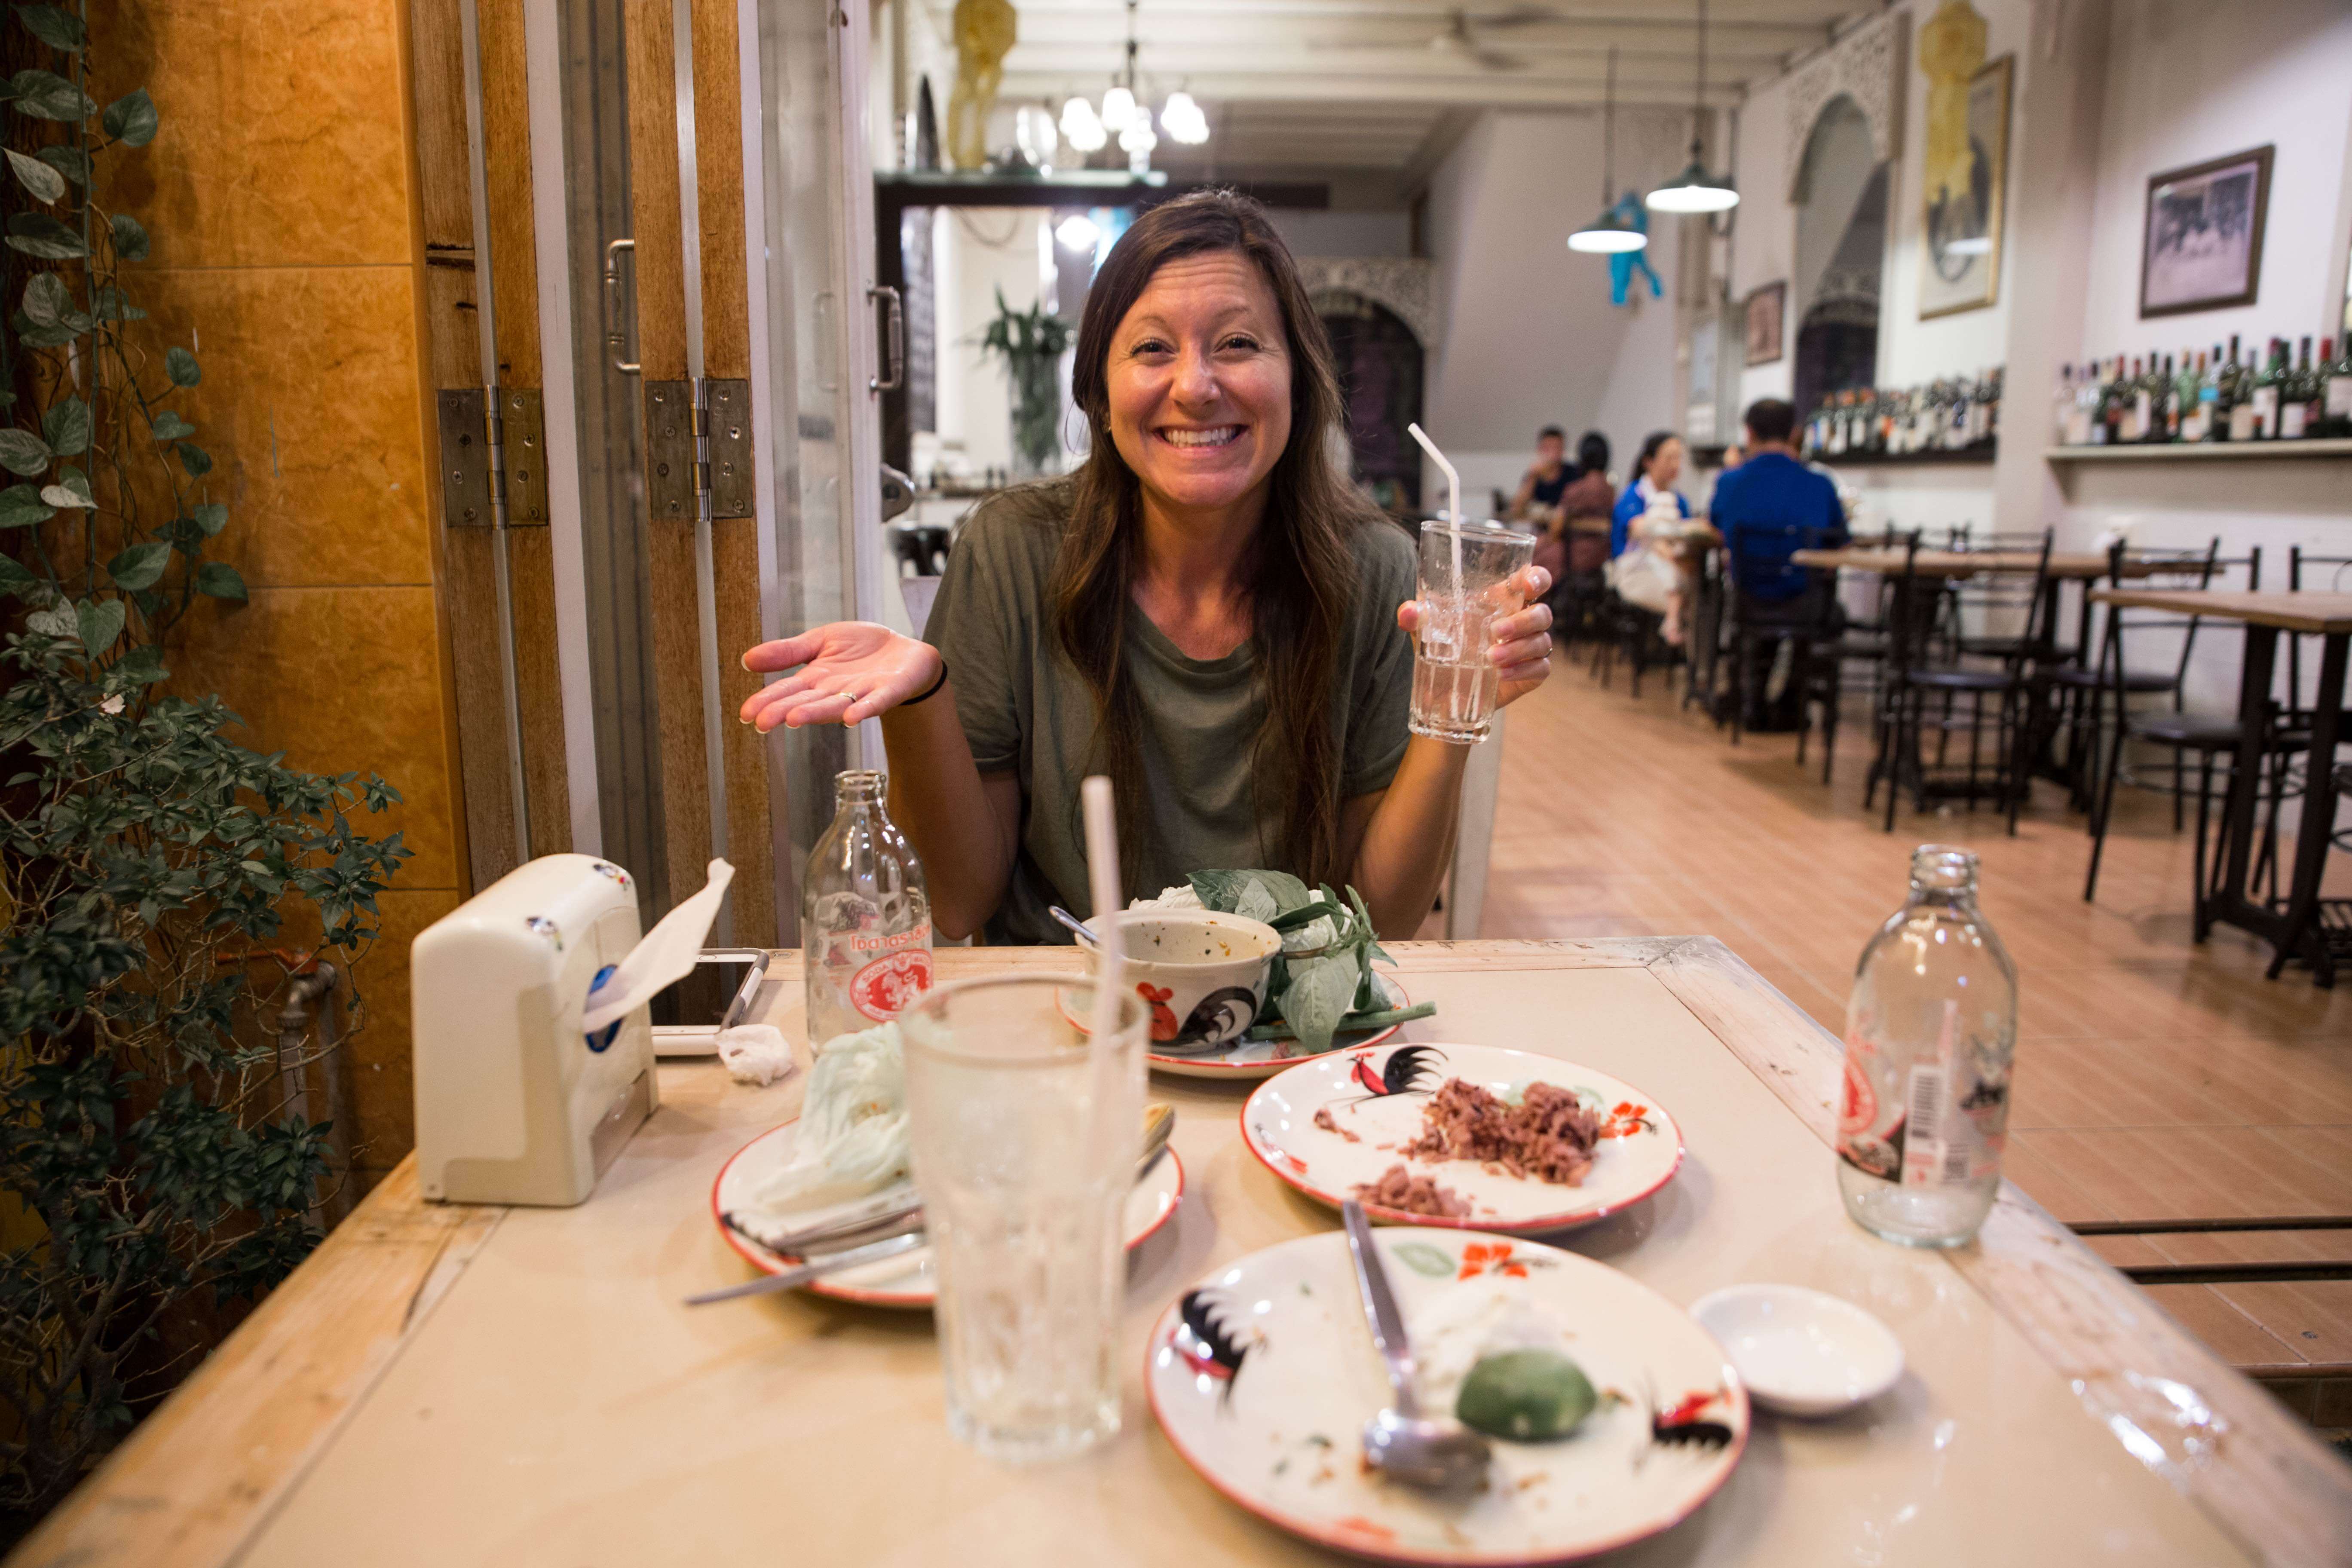
Top 13 Must Eat Foods in Chiang Mai, Thailand
If you’ve just watched our Chiang Mai food video, and you’re wondering where you can find all of these mouth-watering foods, don’t worry! We’ve got you covered! If you’ve somehow managed to find our blog without seeing the video, check out the video below to learn more about all of these dishes. The blog post below is just going to tell you where you can find each dish and approximately how much it will cost.
Chiang Mai is probably our favorite city in the world. One of the biggest reasons we love this city so much is because it’s so easy to find incredibly delicious food with incredibly low prices to match! After living in the city for 5 weeks, these are the foods we found ourselves eating over and over again.
This is by no means a comprehensive guide to eating in Chiang Mai, and it’s a bit biased towards the Nimman area of the city because that’s where we stayed. However, if you’re visiting Chiang Mai, you should make it a goal to eat at all of the places on this list. I guarantee you won’t be disappointed!
Even if you only make it to one of the places, take a picture and tag us on Instagram @karaandnate! Nothing makes us happier than to see you guys supporting these local business owners and having an awesome experience in the process. 🙂
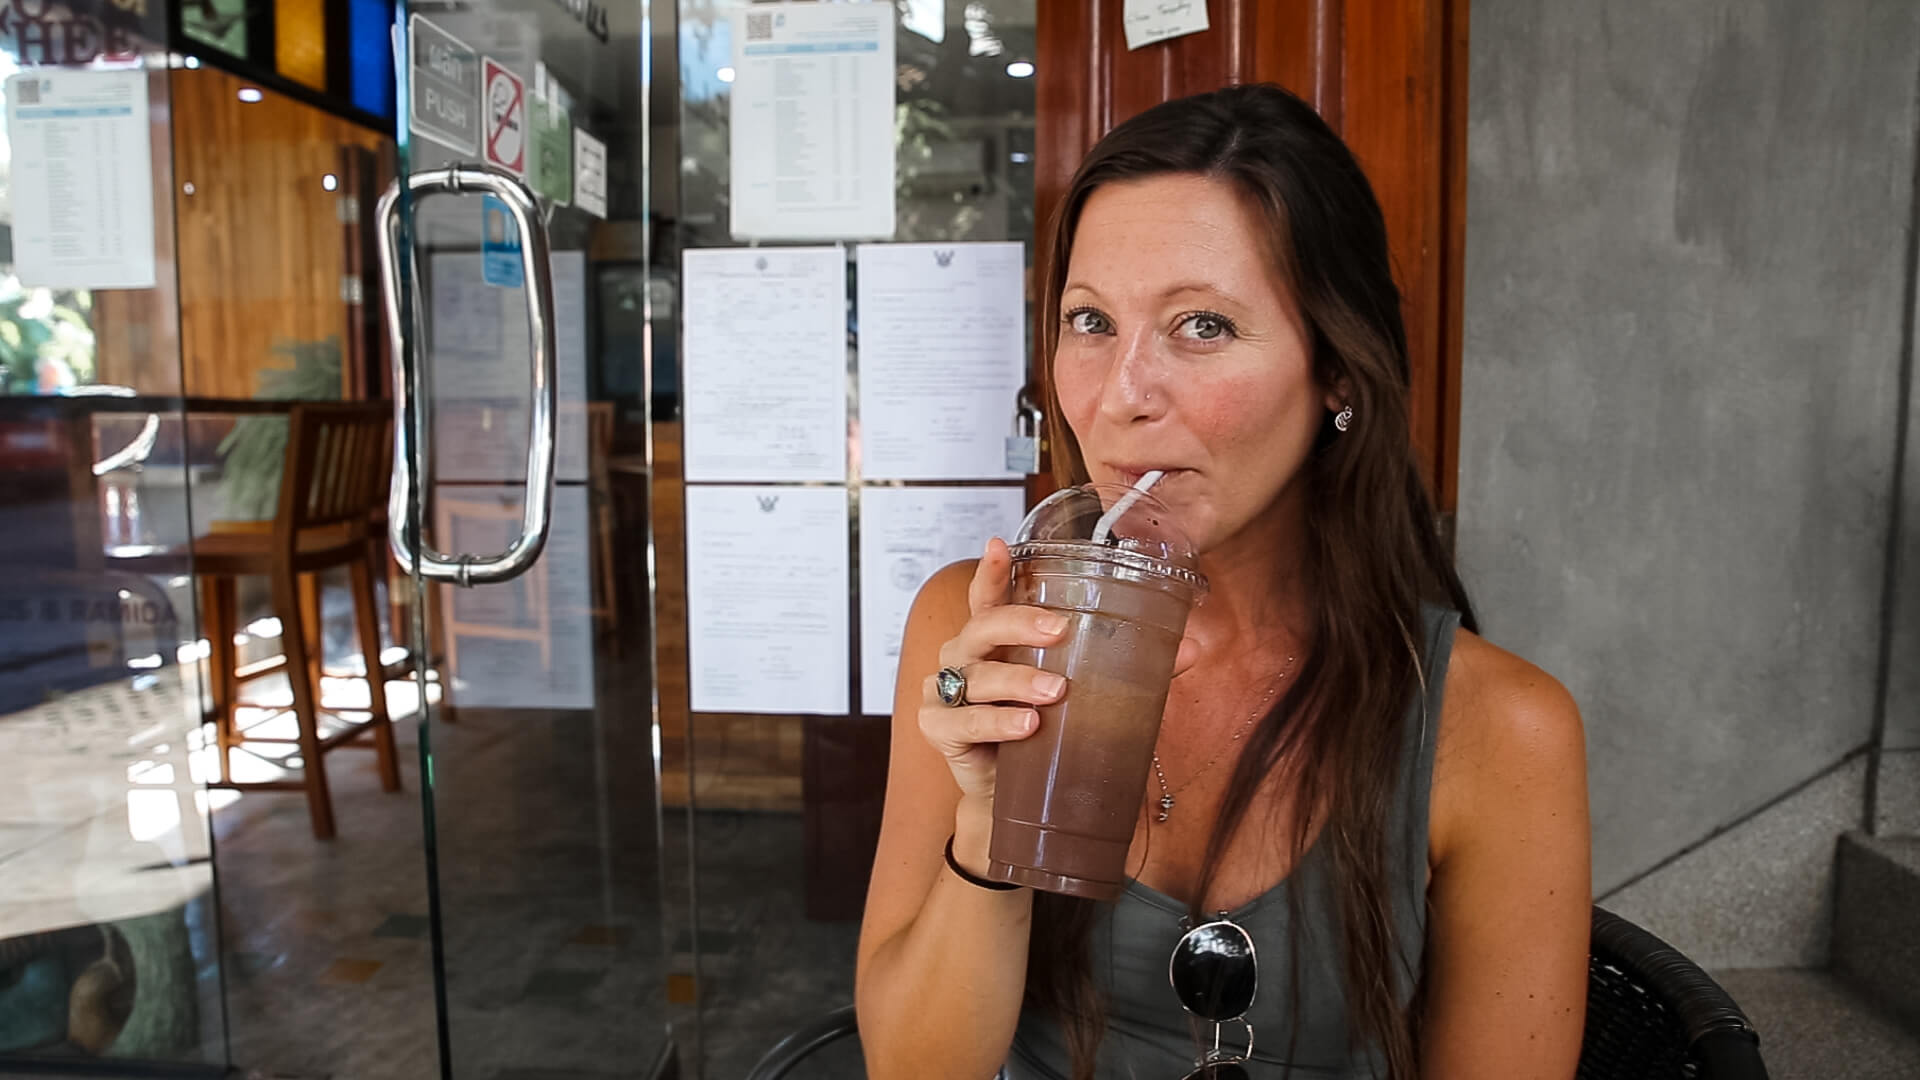
Khao Soi and Thai Tea at Khao Soi Mae Sai
Location (Nimman)
Massaman, Purple Pad Thai, and Fruit Smoothie from Anchan
Location (Nimman)
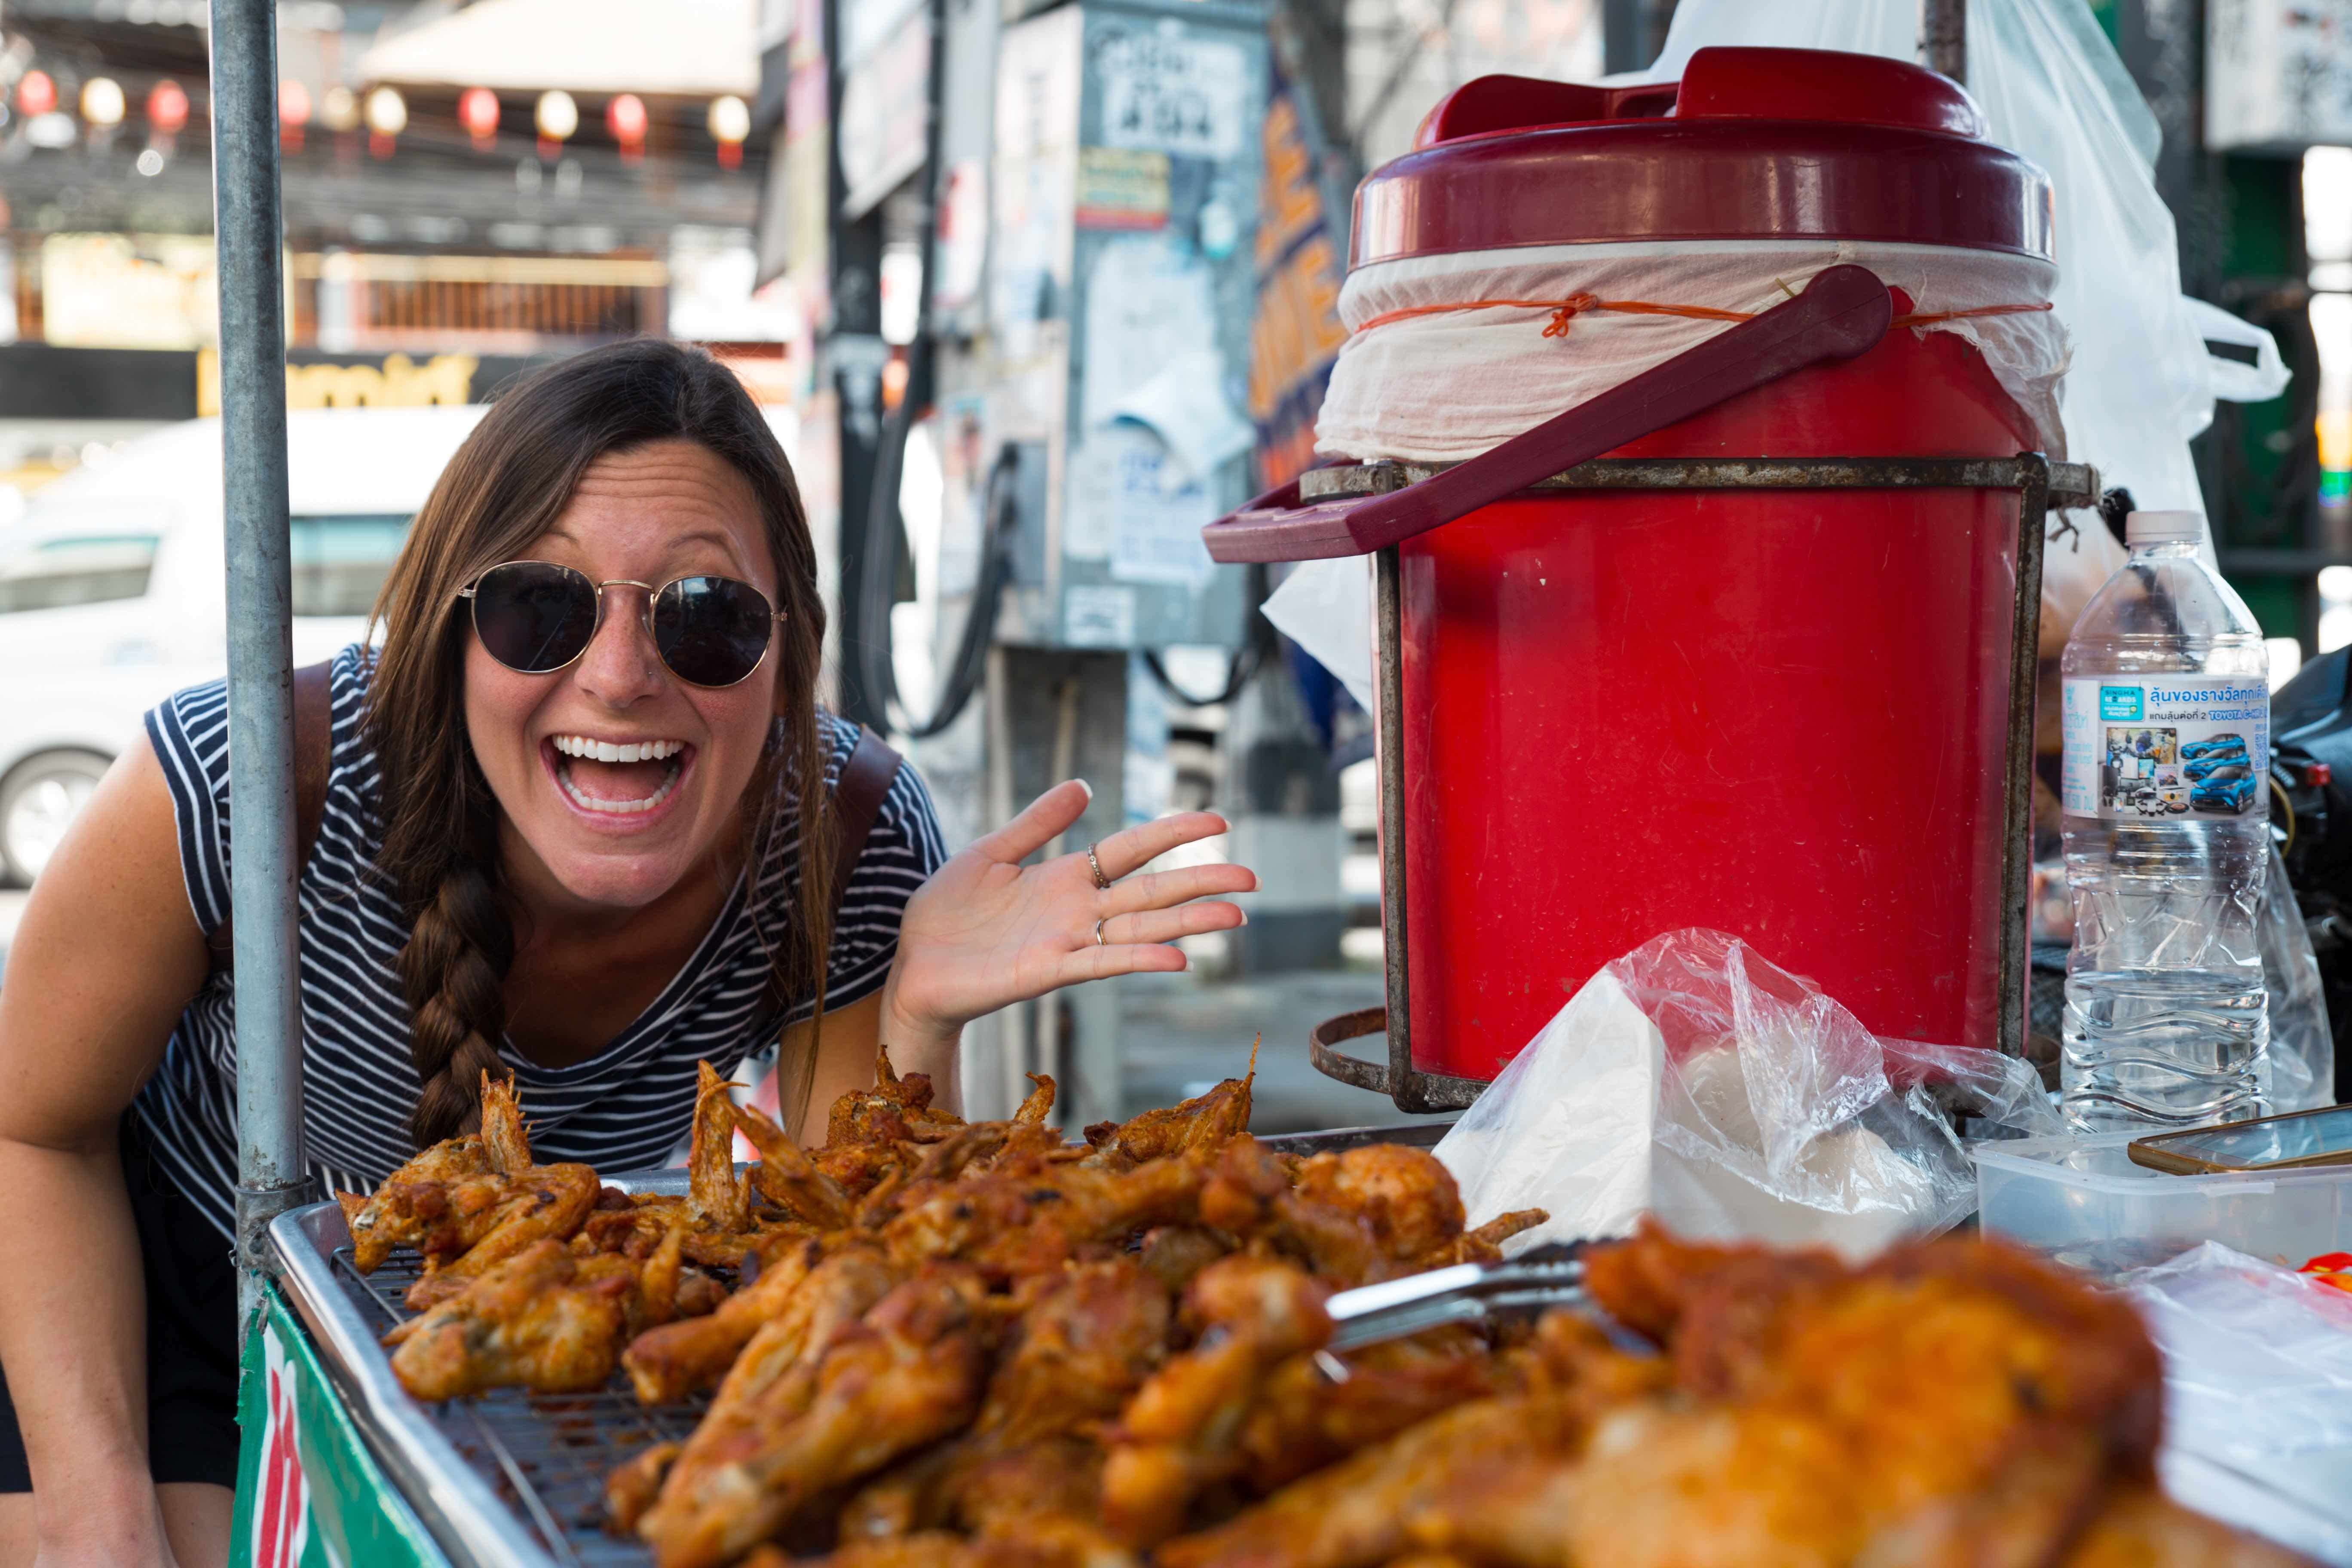
Fried Chicken from The Chicken Man
Location – Nimmana Haeminda Road 9 (somewhere close to the Lotus Express)
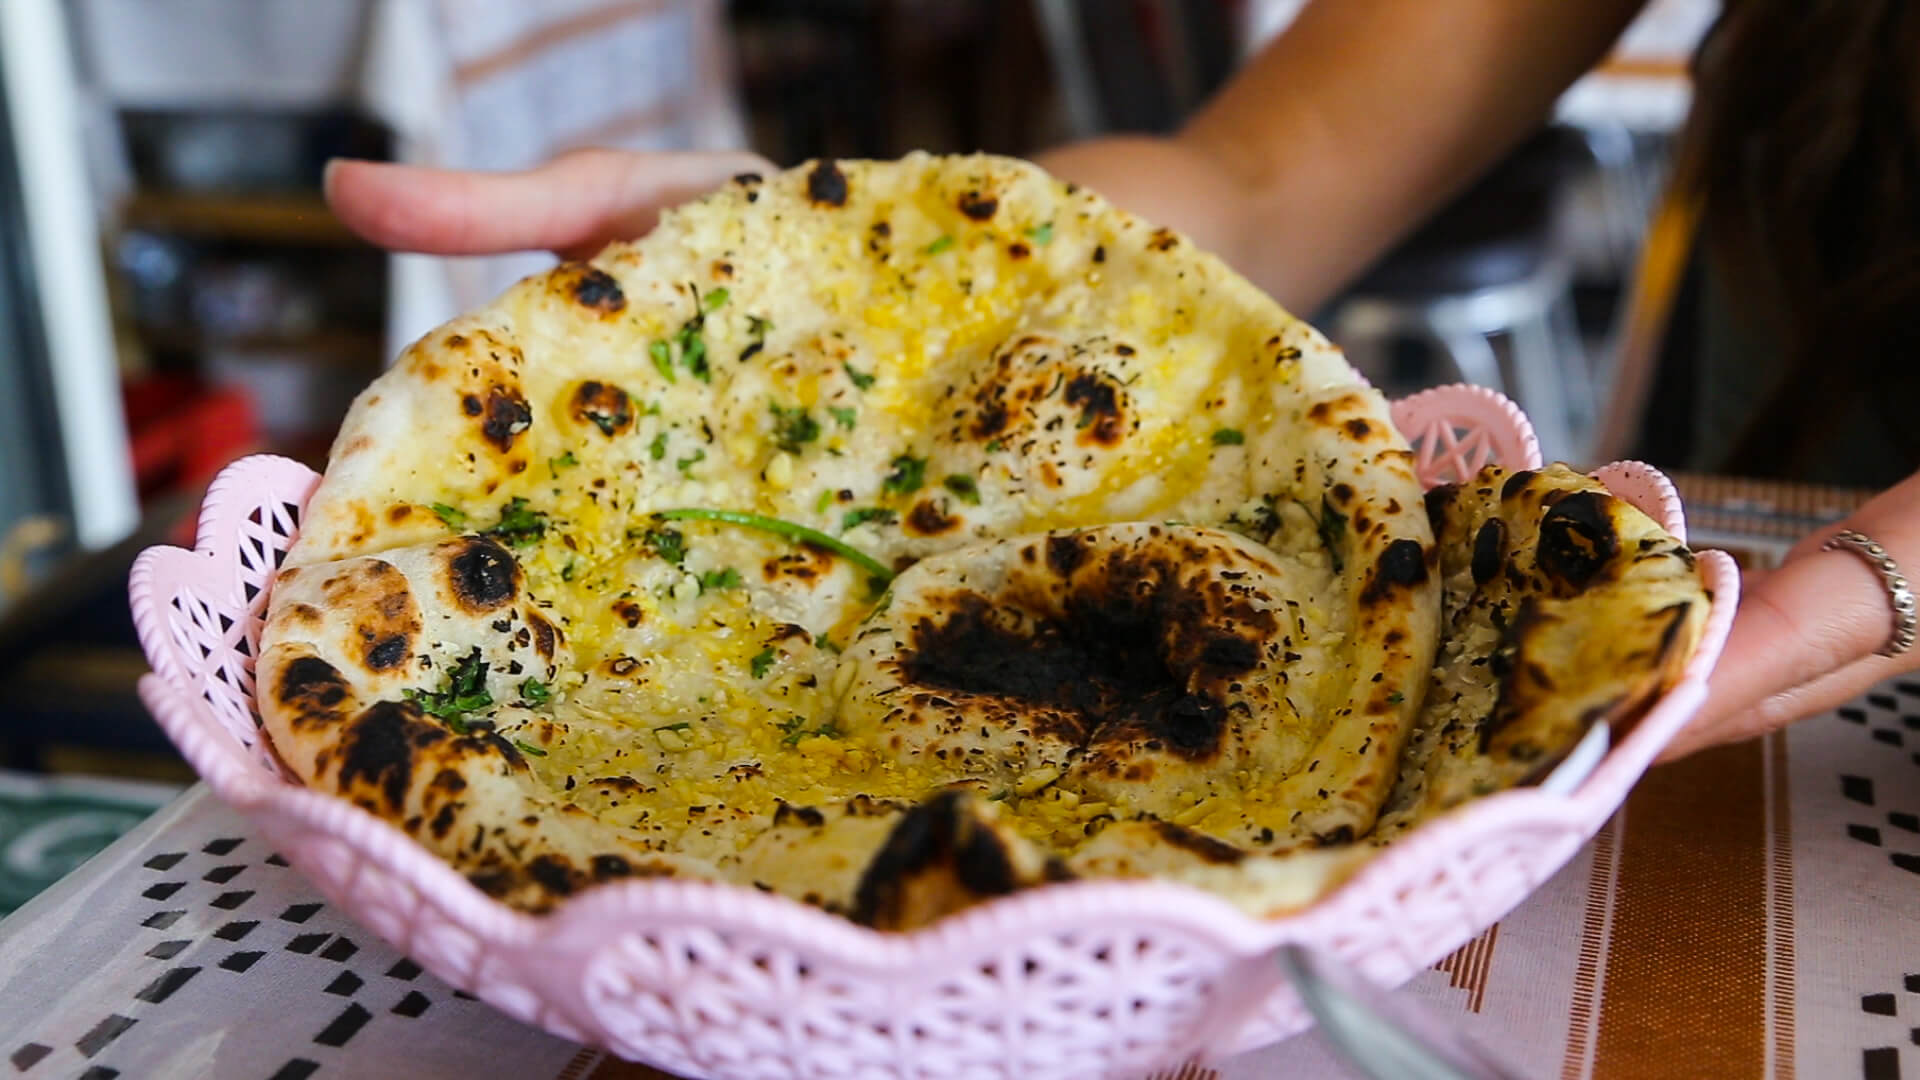
Chicken Tikka, Chana Masala, Naan
Location (Old City)
Banoffee at Fabulous Roasters
Location (Old City)
Tom Yum at the Maya Mall Food Court
Location (Nimman)
Laab at Labkai
Location (Nimman)
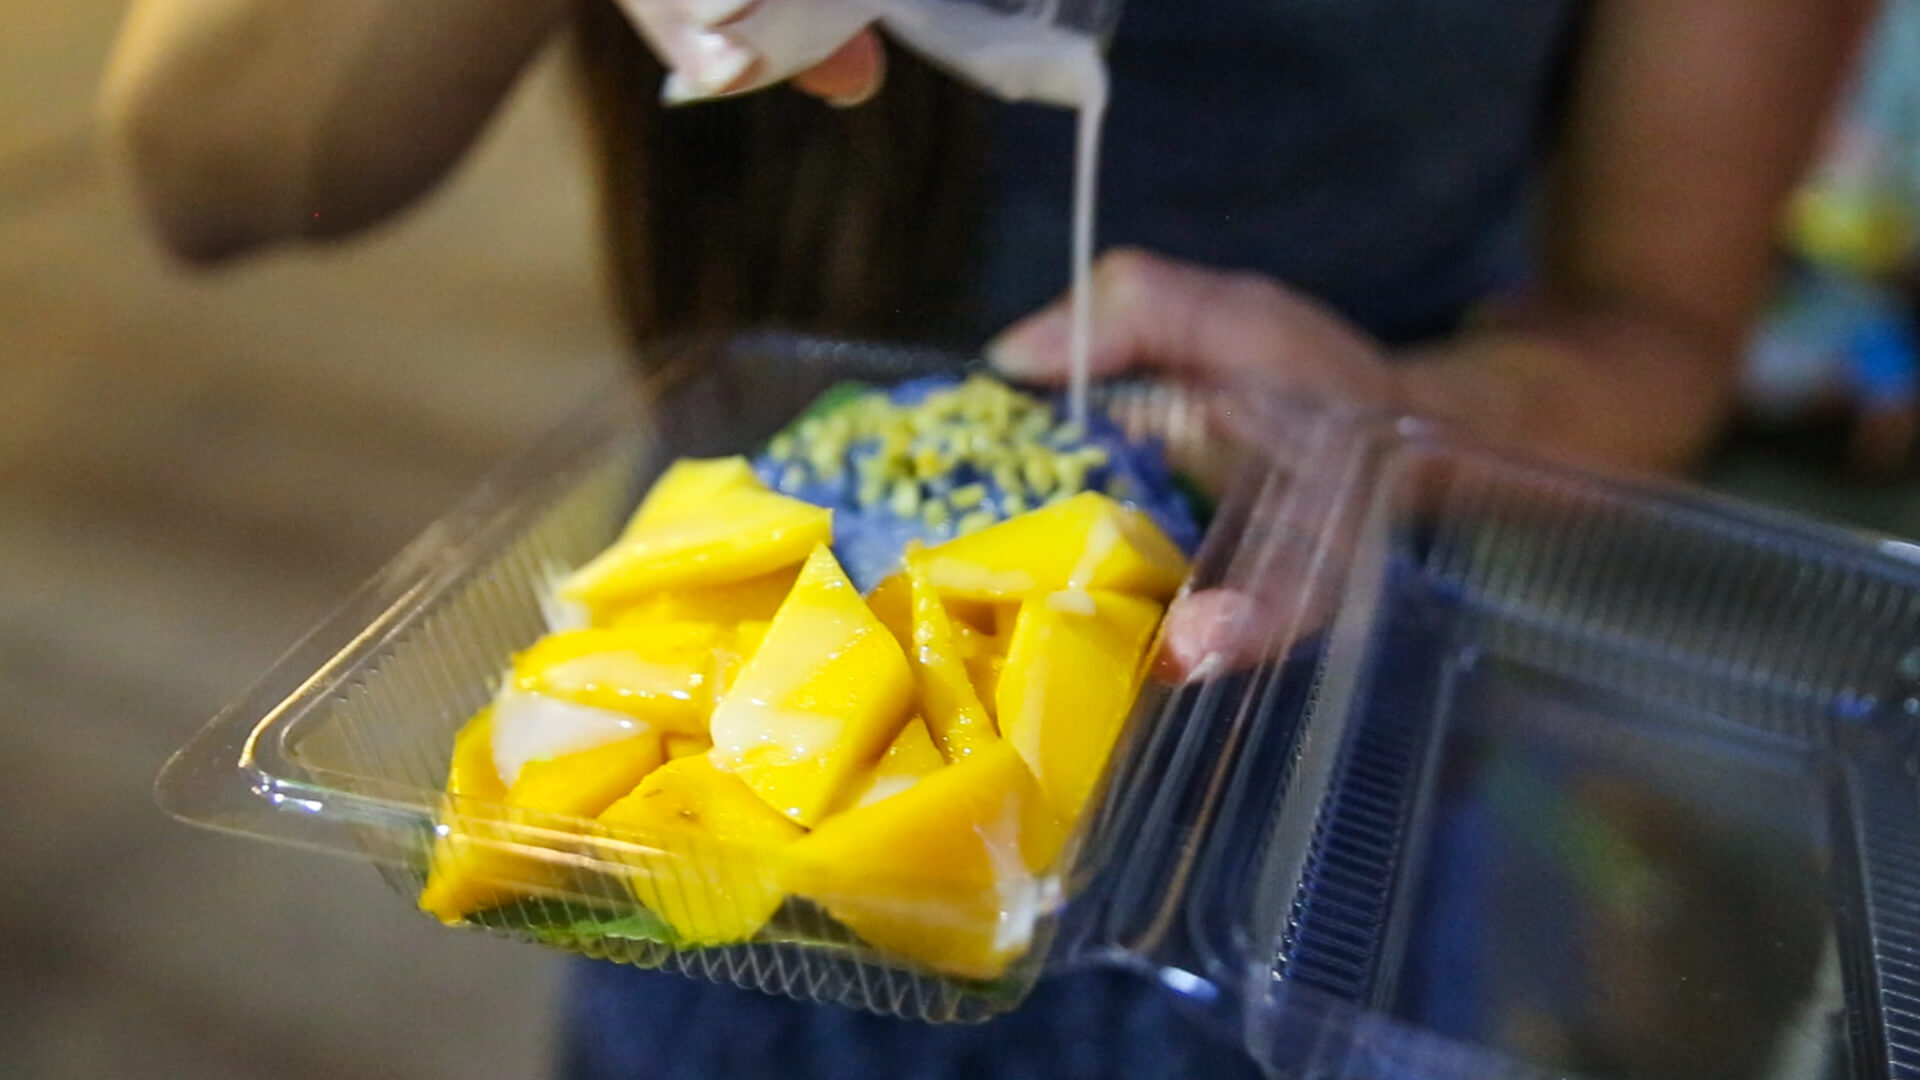
Mango Sticky Rice at Any Street Food Cart You Can Find
Location – Everywhere
We hope you found this guide useful! Don’t forget, if you visit one of these places, be sure to take a picture and tag us on Instagram @karaandnate!
70k Giveaway!!! Win Our Favorite Travel Headphones!
9 Things You MUST Do on Your First Trip to Seoul – A Kara and Nate Travel Guide
If you’re new here, my name’s Nate. My wife (Kara) and I are full-time travel YouTubers on a mission to visit 100 countries by 2019. South Korea was our 62nd country, and it is without a doubt one of our favorite countries we have ever visited!
If you’re making plans to visit Seoul, South Korea, we want to make sure you have an incredible experience just like we did. That’s why we’ve put together a guide of 9 Things You MUST DO on Your First Trip to Seoul. Even if it’s not your first time visiting Seoul, I bet there are one or two things on this list that you’ve never done before!
The Top 9 Things to Do in Seoul, South Korea
1. Visit the Noryangjin Fish Market AND Fish Auction
Our favorite experience in Seoul was visiting the Noryagjin Fish Market! If you visit the market you’ll see hundreds of different types of LIVE sea creatures that you never knew existed. Plus, you can buy the fresh seafood from any of the vendors, and have it cooked at the market.
I believe the market is busiest in the morning and early afternoon, but it’s open 24 hours a day. We visited the market around 6 p.m. There wasn’t a lot of action going on, but there were still plenty of fish to be seen and eaten.
One of the most unique dishes that you can try when visiting Seoul is live octopus. They cut it up right in front of you, and you eat it while the tentacles are still moving. If you’re brave enough, it will be one of your most memorable moments of your trip!
The best place to try live octopus is definitely the Noryangjin Fishmarket. You can purchase your live octopus straight from one of the vendors and pay around $5 for one of the small restaurants in the market to prepare it for you! If you’re really brave, you can purchase a penis fish to accompany your Octopus…
Click play on the video to know what to expect when visiting the market and eating live octopus!
(video coming soon)
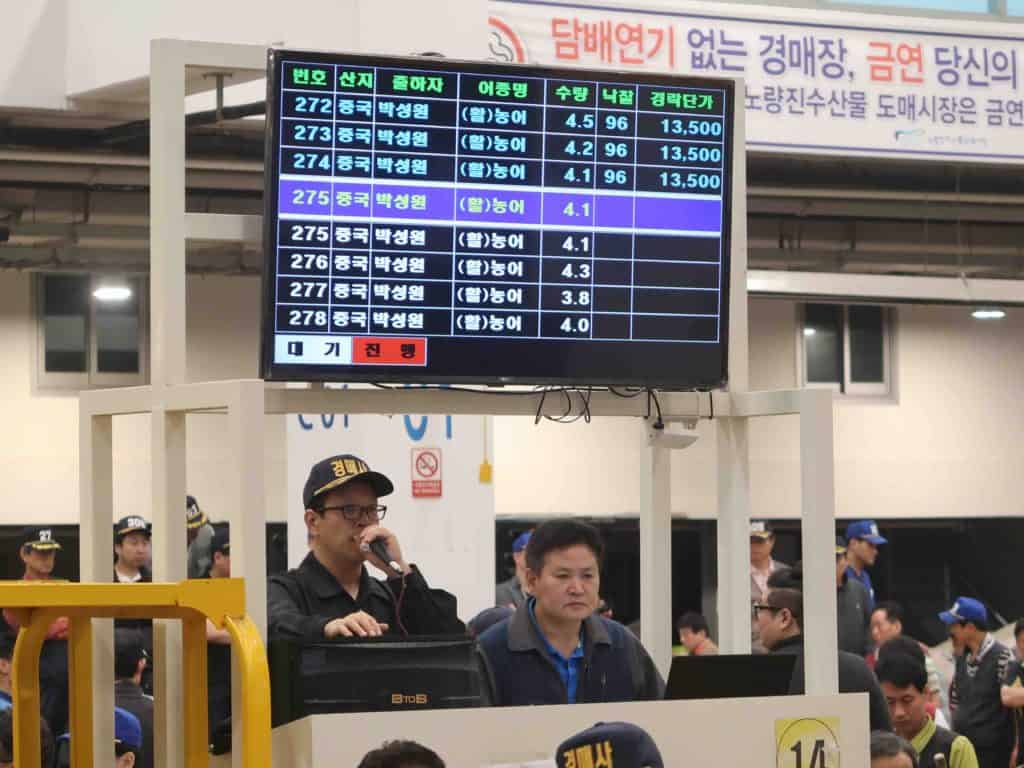
In addition to visiting the market, you should also go to the HUGE fish auction that happens inside of the market every morning starting at 3 a.m.. Kara and I showed up to the auction around 3:30 a.m. and it was still going when we left at 5:30 a.m..
Unfortunately, the metro doesn’t run between 12 a.m. and 5:30 a.m., so you need to find an alternative form of transportation to get to the auction. If you don’t mind shelling out some money, the easiest way to get to the market would be a taxi. Being budget conscious travelers, Kara and I decided to take the night bus. You can learn more about the night bus routes here.
Admittedly, waking up at 3 a.m. and taking a bus or taxi across town is a bit of pain. However, I can guarantee you that the experience will be totally worth it! We didn’t see any other tourists the entire time we were there! It was one of the most authentic travel moments we have ever experienced. From an outsider’s perspective, the market looks like sheer chaos with live fish flopping around everywhere, but after watching for a little while you’ll come to understand the system and you’ll be impressed by the organized chaos!
2. Go to a Riverside Park for Fried Chicken and Beer
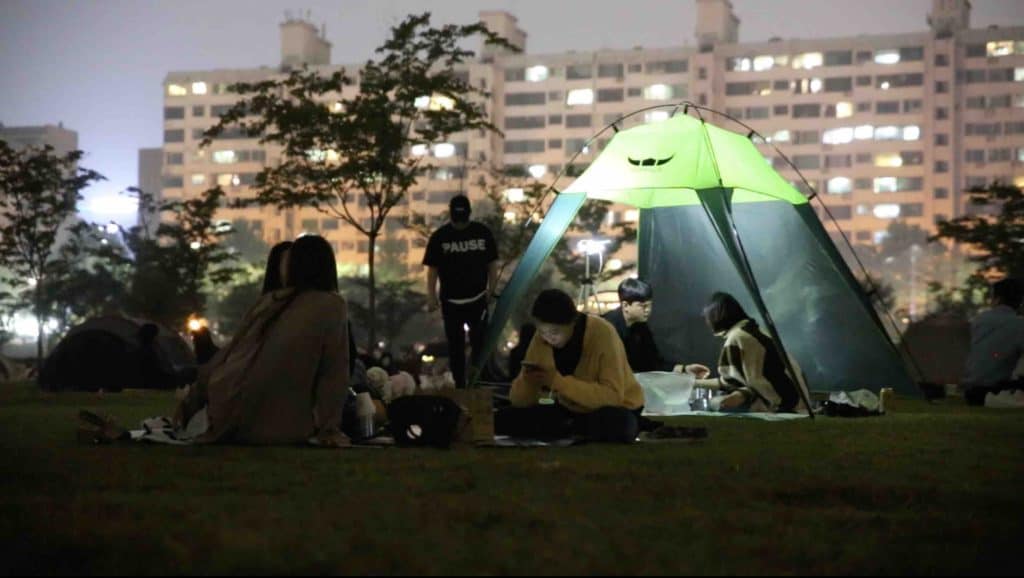
We had been told that it was “a thing” to go to a park along the Han River in the evening and have a picnic made up of fried chicken and beer. We really didn’t know what to expect, but one Friday night we decided to go check it out for ourselves. We showed up to the river around 7 p.m., and boy were we surprised! As soon as we emerged from the metro exit closest to the park, we were immediately bombarded with ladies handing us paper fliers promoting (what felt like) every fried chicken restaurant in Seoul. No joke I ended up with 15+ flyers less than a minute after exiting the subway.
I believe most of the locals use these flyers to order their chicken and get it delivered to the river. Unfortunately, we didn’t have a Korean sim card so we couldn’t call. Even if we could have called, we don’t speak Korean. So we ended up wandering a few blocks away from the river to order our chicken directly from a restaurant.
Once we arrived back at the massive park, we were shocked to see literally thousands of people picnicking in the park. They take their picnicking seriously in Seoul. Many groups had full-blown camping tents set up! We found a small patch of grass close to the river and spent the next couple of hours people watching and enjoying our delicious chicken. Korean fried chicken is seriously good stuff!
This is another super local experience that you can’t have anywhere else in the world. I highly recommend devoting one of your evenings to eating fried chicken the park!
(video coming soon)
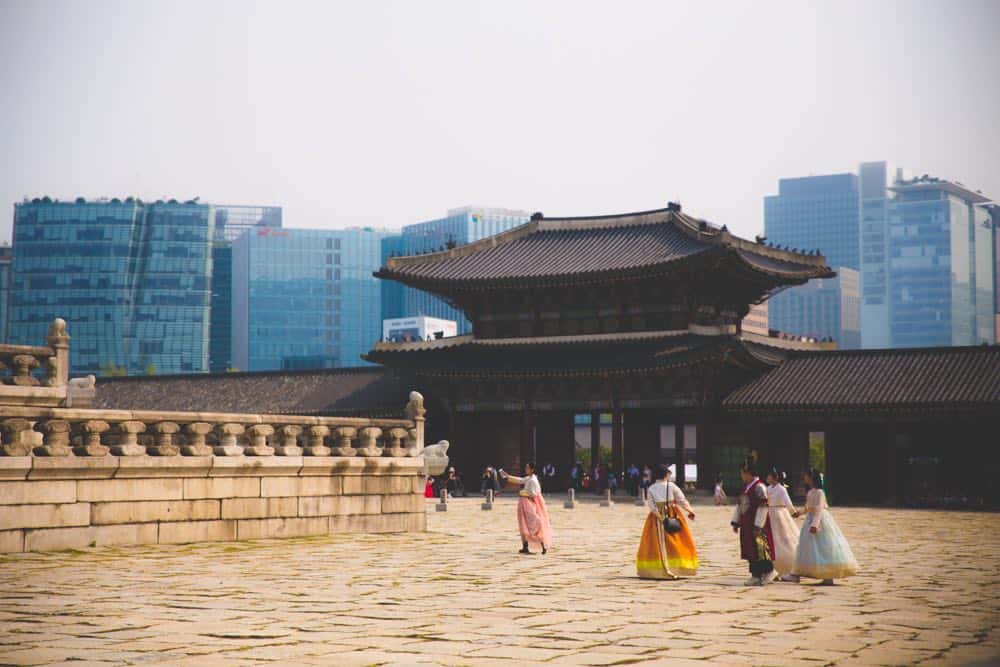
3. Gyeongbokgung Palace & Bukchon Hanok Village
Admittedly, Kara and I are not history buffs. Most of our travel experiences focus on food and adventure. However, we can highly recommend visiting the Gyeongbokgung Palace! The palace is actually one of the few places that I would recommend going to on the weekend when it’s most crowded.
If the weather is good, everyone rents traditional costumes and walks around taking pictures in the palace. I can only assume that this is a new tradition that has become increasingly popular with the rise of social media. Either way, watching people walk around in traditional dress really adds to the experience.
There is also a changing of the guards ceremony that happens at the palace. It’s a reenactment of old traditions, but it’s quite impressive and definitely worth seeing! We caught the 2 p.m. ceremony, but you don’t have to go at 2 p.m. They do it multiple times per day. You can learn the times of the ceremonies here.
When you plan your visit to the palace, you should also set aside an hour or two to walk around Bukchon Hanok Village. It’s a traditional village a short walk away from the palace.We had read a lot about Bukchon Hanok before visiting, so we had high expectations. But if we’re being completely honest, we were a little underwhelmed by the village. However, it’s definitely worth visiting if you go into with the right expectations. Go expecting to walk around this picturesque neighborhood for 30 minutes to an hour and take some good pictures!
(video coming soon)
4. Visit Two of Seoul’s Most Popular Markets (Namdaemun Market & Gwangjang Market)
The Namdaemun Market is the largest traditional market in South Korea! It’s huge! You can find all sorts of stuff at this market ranging from kitchen supplies to cheesy souvenirs. If you like to shop, or you just have a few people at home expecting souvenirs, this open-air market is definitely worth a visit. Kara and I love walking around local markets, and Namdaemun did not disappoint. Even if you don’t need to buy anything, it’s worth going to walk around and experience the vibe.
If there’s one thing the Namdaemun market is missing, it’s food. But don’t worry, the Gwangjang Market has you covered. This market is dedicated to delicious food, and unlike the fish market most of the food here is cooked!
The Gwangjang Market is a covered market made of at least 100 food stalls! The biggest issue you’ll face when visiting the market is deciding what to eat, so I’ll help you out! Don’t leave the market without having a bowl of chopped noodle and dumpling soup and at least one deep fried Korean pancake! If you’re really feeling brave you can try the pork foot!
(video coming soon)
5. Go to One of The Oddly Themed Cafes
Seoul has a plethora of unique cafes! I had a list of several that we wanted to visit, but unfortunately, Kara and I ran out of time to visit any of them! Hopefully, you can go check out at least one of them and let us know what we missed out on. Below is a list of the 5 most interesting cafes I came across when researching online!
Blind Alley Cafe – If drinking coffee with a raccoon sounds fun, this is the place for you!
Thanks Nature Cafe – If you’d rather pet a sheep while you sip your cappuccino, go here.
Hongdae Meerkat Cafe – Maybe you prefer enjoying your latte with a meerkat?
Poop Cafe – Enough with the animals, if you’d rather drink your coffee out of tiny toilet, you can do that too.
6. Visit The Korean War Museum
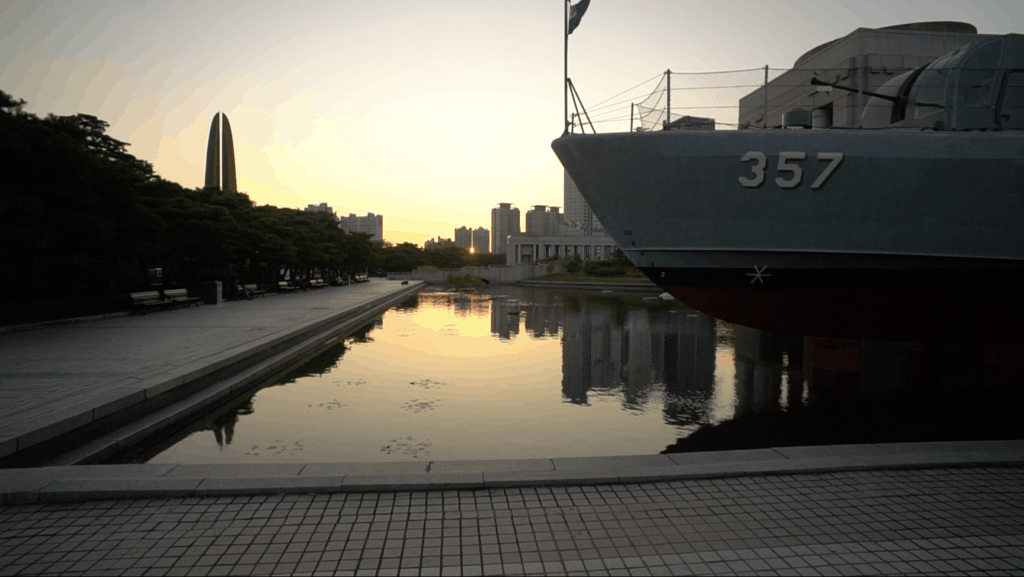
Once again, Kara and I are not into history, but the Korean War Museum was awesome! It’s one of the best museums we have ever been to, and it’s completely free! If you want to gain a deeper understanding of Korea’s past and learn why the Koreas are separated into two countries, I highly recommend devoting at least a couple hours to the Korean War Museum!
Plus, outside of the museum they have over 50 retired military vehicles on display, and they’ll even let you climb inside a few of them!
(video coming soon)
7. Spend The Night at a Jimjilbang (A Korean Spa)
Where to start… to enter the spa you have to be completely naked, so this experience is not for the self-conscious. However, if you’re willing to embrace the awkwardness of being naked with a bunch of Korean strangers, this could the most memorable experience of your entire trip. But wait! It gets weirder. It’s actually really common in Korea to spend the night at the spa. On the tile floor… After eating smoked eggs…
One night Kara and I spent 5 hours at the jimjilbang from 10 p.m. to 3 a.m., so instead of trying to explain the bizarre experience in words, I’ll just let you watch the video!
(coming soon)
If you’re brave enough to try to recreate our jimjilbang experience for yourself, we visited the Dragon Hill Spa, but the Siloam Spa is also very popular. Do your research to decide which one to visit. I’m sure you’ll have a good time at either place!
8. Visit the Demilitarized Zone (DMZ) Between North and South Korea
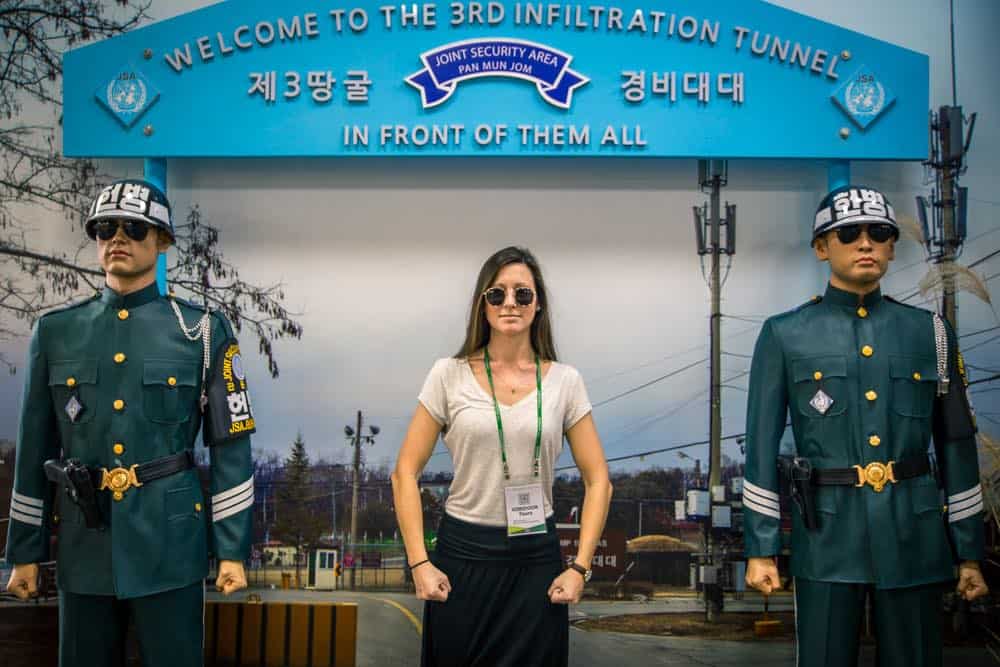
The DMZ isn’t technically in Seoul, but it’s an easy day trip so I’m including it in this guide! The DMZ is a 4 km wide stretch of land that runs the length of the North and South Korean border. When you visit the DMZ you’ll have the opportunity to actually step into North Korea. There is a neutral conference room that sits on the border between the two countries. When you enter the conference room you’re in South Korea, but once you cross the table in the middle of the room you are “technically” in North Korea.
You can’t go to the DMZ alone. You have to go with a guided tour (make sense). There are a ton of companies reselling DMZ tours, but from what I understand there are only three companies who are actually allowed to operate tours in the DMZ. One of those companies actually running the tours is Koridoor Tours. We had read a ton of good reviews about the company, so we ended up booking a tour with them, and we’re glad we did! We had a great experience! If you want to see what the tour was like, you can watch the video! In addition to getting to stand in North Korea, we also got to visit a secret tunnel that North Korea dug under the border, and we went to an observation deck where we could look into the North Korean Propaganda Village with high powered binoculars.
(video coming soon)
If you’re worried about safety, you should know that over 100,000 tourists per year visit the DMZ. Obviously, I can’t guarantee your safety during the tour, but they wouldn’t let that many people visit the DMZ if bad things were happening!
9. EAT EVERYTHING
The food in South Korea is INCREDIBLE! Seoul is our new favorite “food city” in the world! Besides the live octopus, we didn’t have a bad meal the entire week! Everything we put in our mouth was delicious!
This definitely is not a comprehensive food guide to Seoul. We were only there for a week, and I’m pretty sure you could eat at a different restaurant every day for the rest of your life in Seoul. However, I did want to share with you a few of the meals and restaurants we really enjoyed!
One of our top foodie experiences in Seoul was eating our way through the Myeongdong Night Market. At 5 p.m. every evening over 100 street food vendors converge in the Myeongdong District rolling their carts into the streets and setting up shop for the night! We did our best to try all of the delicious foods in one evening, but we didn’t even come close. The highlight of the evening was a mixture of thinly sliced pork belly and green onions on a skewer cooked on a grill, topped with spicy sauce, and finished off with a blow torch! It was incredible!
There are two other restaurants in the Myeongdong District that we can highly recommend. The first is called Myeongdong Kyoja. If you’re looking for the most delicious dumplings and noodle soup in Seoul, you just may find it here.
We also recommend checking out Yoogane in Myeongdong. They serve a spicy chicken dish called Dak Galbi that is prepared right at your table! Your waiter will bring raw meat, veggies, and spicy sauce to your table, mix them all together, and cook the delicious concoction on a griddle that sits in the middle of your table. Apparently, there’s a version that comes with cheese, we didn’t know about this until after we ate, but that would have been a great addition to the dish!
Of course, no trip to South Korea would be complete without eating Korean BBQ. This is a hands-on experience. You cook the meat yourself right at your table. Then, they’ll bring you 5+ side dishes and a plate of lettuce leaves. We learned that you’re supposed to use the leaves like a taco shell. You lay your cooked meat and a few sides on top of the lettuce leaf and then roll it up and eat the whole thing in one bite. At least I think that’s how you do it. You can watch us struggle through the experience in the video below.
(video coming soon)
Soju isn’t a food, its an extremely popular drink! It was rare to see a dinner table without a bottle (or three) accompanying the meal. It’s rice liquor that is steeped in tradition. Watch the other tables carefully and you’ll notice that no one pours their own glass, and as soon as someone’s glass is empty, it won’t stay empty for long. A friend is always there to fill it up!
Unfortunately, we weren’t able to try everything we wanted to while in Seoul, but maybe you can! Things we didn’t make it around to trying but came highly recommended by our viewers include:
Bingsu – Super Fancy Shaved Ice
Bokkumbop – Fried Korean Rice
Bulgogi – Some type of beef/rice hotpot dish
Hotteok – A deep fried dough stuff with savory or sweet filling
What to Expect When Visiting Seoul, South Korea
That about wraps up our top things to do in Seoul! If you’re getting ready to travel to Seoul for the first time, and you want to get an idea of what to expect on your trip, I highly recommend checking out our Seoul video series!
(coming soon)
I hope this guide makes your trip to Seoul better one way or another! If it did, be sure to let us know on YouTube or Instagram!
The Ultimate Guide to Riding the Trans-Siberian Railway
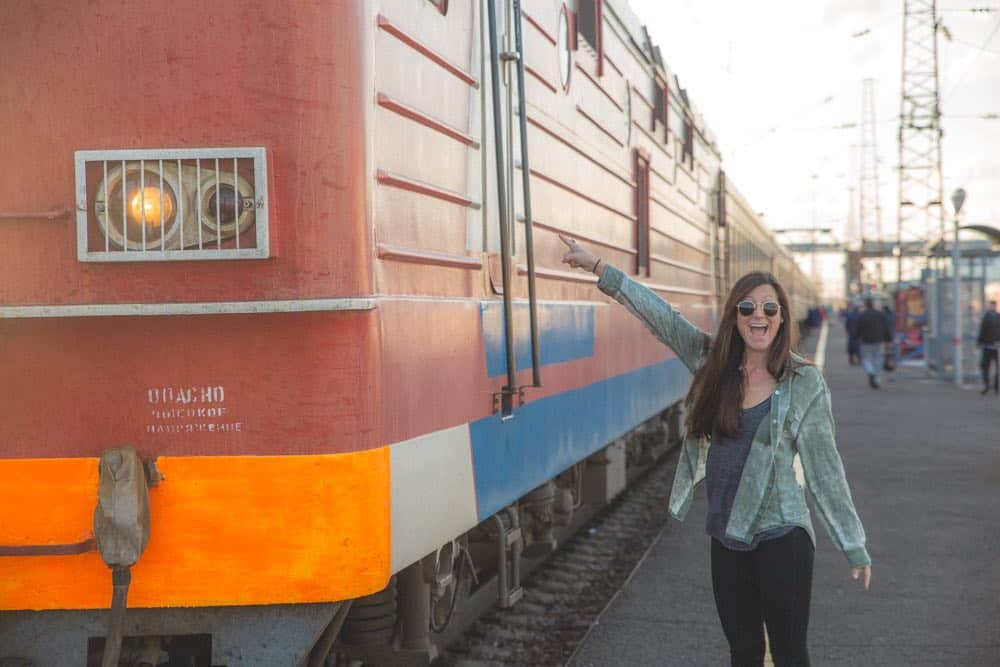
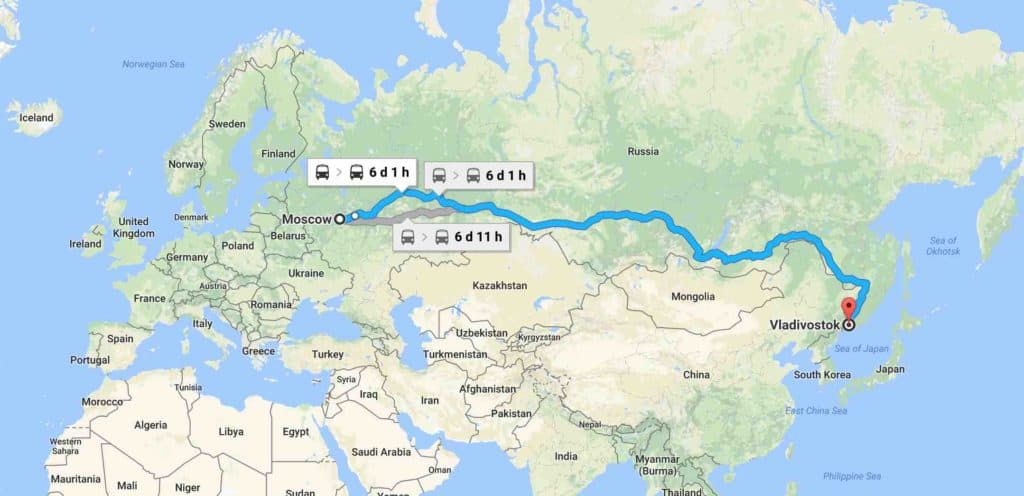
Welcome to the Ultimate Guide to Riding the Trans-Siberian Railway! Kara and I just completed our 11 day Trans-Siberian journey from Moscow to Vladivostok. Our entire journey covered over 9,280 km. We spent 7 nights sleeping on the train, 4 nights sleeping in cities a long the way, and consumed far too many instant meals to count.
We have traveled to over 60 countries, and the Trans-Siberian has been one of the hardest trips I have ever planned. First, we had to sort out our Russian visas. Next, we had to figure out our route. Then, we had to figure out how to buy the train tickets (without getting ripped off), and that was just the beginning of the planning.
Before leaving for this trip, I really struggled to find all of the information I needed to plan and book this trip independently. It was even harder to get a feel a for what the trip itself would actually be like.
So, I’m hoping this blog post can serve as a practical guide to help you plan your trip, and our YouTube videos will give you an idea of what to expect day in and day out. If you’re wondering why you’d ever want to spend 11 days riding across Russia on a train, check out some of our YouTube videos from the trip!
Hopefully after watching our videos you’re ready to book your trip! So, without further ado, let’s jump into the nitty gritty stuff – starting with Visas.
Getting a Russian Visas
Kara and I both hold passports issued in the U.S.A., so this section is going to be written from the perspective of an American citizen. If you don’t have an American passport, you’ll need to do some additional research. However, I’ve heard the process is similar in most countries.
There are actually three steps in the visa process:
- You need to get a letter of invitation.
- You need to get a visa.
- You need to register your visa once you get to Russia.
If you already know the exact dates of your travel, and you can pre-book your accommodations, this will make the visa process much easier. Kara and I rarely plan more than three weeks in advance, so we did not have our accommodations booked and did it the more challenging way.
Step 1: Getting a letter of invitation.
If you are able to pre-book your accommodations, choose an accommodation that will provide you with a letter of invitation. Most large hotel chains will offer this service free of charge.
If you won’t be pre-booking your accommodations, you’ll need to get a letter of invitation by other means. Most visa service companies will offer this service. However, I found that most visa service companies drastically overcharge for this. For example, we used VisaHQ to obtain our visa (more on that further down the page) and they were going to charge us $50 per person for a letter of invitation.
However, I did some additional research online and found that Fortuna Travel offered letters of invitation for only $12. I wasn’t sure whether or not to trust a random website I found online, but I figured worse case scenario I would only lose $12.
Fortuna Travel turned out to be completely legit. They sent me an invitation in less than an hour, and when I sent the letter of invitation to VisaHQ they had no trouble using it to process my visa.
Side note: In order to get a letter of invitation (and your visa), you’ll need to let them know where you’ll be staying during your trip.
Kara and I had no clue, so we booked a refundable hotel in Moscow through Booking.com.
Get $20 off your first stay on Booking.com
You don’t actually have to stay where you say you’re going to stay on your visa. Kara and I actually ended up canceling our stay at the hotel we booked, and we instead spent 5 nights in an Airbnb in Moscow. That turned out to be a big mistake, but we’ll get to that later in the post.
Step 2: Applying For Your Russian Visa
After you’ve secured your letter of invitation, you’re ready to apply for your visa. In order to apply for a Russian visa in the U.S.A., you (or another human) must personally deliver your visa application to one of the Russian consulate offices located in the United States. You CANNOT mail in your visa application.
Below is a list of the cities where Russian consulate offices are located.
- New York, New York
- Washington D.C.
- Seattle, Washington
- Houston, Texas
If you don’t live close to one of these cities you are left with two options.
Option 1: You can drive a long way and personally hand in your application.
Option 2: You can use a visa service to hand in your application on your behalf.
The first option is cheaper but will take a lot of time. The second option is much easier but more expensive.
We live in Nashville, Tennessee,. The closest Russian consulate office is in Washington D.C. which is a 10+ hour drive. So, we opted to use a visa service company.
Once you start researching online, you’ll find tons of visa service companies willing to help you secure your Russian visa. The service fee each company charges varies substantially.
We needed a rush visa because we were leaving the U.S. in 10 days and wouldn’t be back before starting our Trans Siberian trip. VisaHQ offered the best prices for a rush visa so we decided to try them out, and I’m so glad we did!
I can highly highly recommend VisaHQ. I called them on the phone multiple times for help filling out the visa application, and they were always super helpful!
Plus, they have an automated system that sends you updates throughout the process so you know the exact status of your visa the entire time.
A few pro tips for filling out your Russian visa:
- You don’t have to enter the country on the day you say you’re going to on your visa. However, that is the day your 30 day window will start. Therefore you don’t have to be exact when you enter your arrival date on the application, but you should be close if you want to spend the maximum amount of time in Russia.
- You don’t have to stay where you say your staying on your Visa, so don’t stress about booking your accommodations before submitting your Visa.
- The application asks for every country you’ve visited in the last 10 years. Thankfully, you only have to list the 5 most recent!
If you have any other questions while filling our your visa, I highly recommend calling VisaHQ!
Step 3: Registering your visa
Now that you have your Russian visa, you have everything you need to legally enter Russia. However, once you get to Russia you must register your visa within 7 working days. You only have to register your visa if you’re going to be in Russia for more than 7 business days. I’m going to assume most people who are riding the Trans-Siberian will need to register their visas.
The easiest way to get your visa registered is to stay in a hotel that offers the service free of charge. Most big hotel chains will offer this service, but make sure you ask before booking. This is another reason why it’s better to have your hotel booked ahead of time.
This is where Kara and I really messed up. I booked an Airbnb without asking about the registration process. On the day we checked in I asked our host about registering our visa, and she tried to charge us $100 per person. Knowing that most hotels offered this service for free, I had a pretty good feeling were getting ripped off.
It’s supposed to be your host’s responsibility to register your visa no matter where you are staying, but we were determined to find another way besides paying our host too much. However imagine explaining that to a Russian police officer who only speaks a few words of English. Our visa registration was never checked, but we heard that you end up paying a very large fine if caught without it, so I don’t think it’s worth risking.
Thankfully, we ended up making a local friend who offered to register us at her address free of charge. Otherwise, I guess we would have been left with no choice but to pay our Airbnb host $200.
So, the moral of this story is either book a hotel that offers the service, or negotiate with your Airbnb host before you book a stay at their property.
In addition, I’ve heard that most hostels and cheaper hotels offer the service for a small fee between $5-$10. This could also be a good option, just make sure you know the fee before you book!
There you have it! It’s a bit complicated, but it shouldn’t be too painful if you follow my suggestions. That should be everything you need to know in regards to getting your visa sorted for riding the Trans-Siberian!
Planning Your Route
There are two main routes that you’ll most likely be choosing between. The first route is the Trans-Siberian which runs all the way across Russia from Moscow to Vladivostok and vice versa. The second is the Trans-Mongolian which runs from Moscow to Beijing (through Mongolia) and vice versa.
Our Route
We took the Trans-Siberian because we ran out of time to get our Chinese visa. I would highly consider doing a second trip just to experience the Mongolian and Chinese portion of the trip.
Since we rode the Trans-Siberian, that is the route I am going to focus on in this post. First, I’ll tell you about our exact route, and then I’ll tell you what we would have done differently looking back.
The first leg of our trip was from Moscow to Irkutsk. This was 74 hours of non-stop train travel.
We stopped in Irkutsk for two nights. Then we hopped back on the train for a short 6.5 hour ride to our second stop of Ulan-Ude.
We stayed in Ulan-Ude for two nights before beginning the final leg of our journey to Vladivostok which was another 64 hours of non-stop train travel.
Our trip lasted 10 days and 11 nights. Four days were spent on land and 6 days were spent on the train. We spent 7 nights sleeping on the train, two nights in a hostel, and two nights in a hotel.
To be completely honest, we really enjoyed the long legs (74 & 64 hours) of the journey. But keep in mind that we travel full-time, and it was nice to be stuck in the same spot for 6 days while getting to catch up on work and experience different views out the window. With that said, I think we missed a couple interesting stops that you might want to consider when planning your journey.
What We Might Have Done Differently
We met several local Muscovites when we were in Moscow for 5 days before the trip. They all recommended that we stop in the town of Kazan. It’s a predominately Muslim city, and they all seemed fascinated by it. At this point, our tickets were already booked so we didn’t have the option to stop. However, we try to take advice from locals anytime we can. So, I’d highly recommend doing some research on this city when you’re planning your trip.
If you have any appreciation for Russian history, you’ll want to stop at Yekaterinburg. It’s the town where the last tsar of Russia and his family were executed. I saw this stop listed on many itineraries when I was booking our trip, but at that point I didn’t have a good appreciation for Russian history. However the longer I stayed in the country, the more fascinated I became by its history. So you may want to book this stop ahead of time and assume you’ll be more into learning about the last tsar when you arrive.
The next change I would make to our itinerary would be stopping in Irkutsk for 3 days instead of 2. The main draw of this stop is seeing Lake Baikal, which is the deepest lake in the world.
Irkutsk is the closest major city to the lake; it’s still a 2-hour drive away, though. There is a popular island on the lake called Olkhon Island that most tourists take a ferry to and stay overnight.
However, you need at least 3 days for this trip. It takes 7 hours by the time you drive to the lake and ferry to the island, so you’ll need one full day of travel for each leg of the journey, and you’ll want one full day to explore the island. So, I highly recommend scheduling at least 3 days in Irkutsk.
Ulan-Ude, on the other hand, could definitely be seen in a day. There really isn’t a lot to see in the city. The main attractions include the world’s largest statue of Lenin’s head, the main walking street in the center of town, a beautiful church that sits near the end of the walking street, a monastery that sits on a hill and overlooks the city, and another monastery that’s located 45 minutes outside of the city. So, you could easily see all of the major sites in one day if you planned ahead.
There’s no harm in spending more than a day in the city. We enjoyed having a day of rest. I just wanted to let you know that you don’t need to schedule more than one unless you want to.
In all of my research, I didn’t come across much to do between Ulan-Ude and Vladivostok. So I don’t think there are any additional stops I would suggest adding on to the last leg of our trip.
The last change I would have made on our journey would be the amount of time we spent in Vladivostok. Unfortunately, the flight we needed to get to our next destination left the morning we arrived. We didn’t get to see any of the city which was really sad because it looked really cool. At the same time, when first booking this trip, we had no idea how much we would enjoy Russia. We were kind of hoping we would be sick of it by the end and ready to get to the airport, but that wasn’t the case!
When to ride the Trans-Siberian
The time of year you decide to ride the Trans-Siberian is going to totally depend on personal preference. However, after having completed the trip, I wanted to give you my thoughts on when to go.
Personally, I think there are two seasons you should consider for your trip, fall or winter. We got lucky and planned our trip in the fall because that’s when Russia fit into our travel schedule. In the fall the weather is mild, and the leaves are changing colors which made the scenery even more beautiful.
Russia has no shortage of trees. In fact, you’ll be staring at trees through your train window for the majority of the Trans-Siberian journey. So I recommend going in the fall when the trees are most beautiful. We started our trip on Sept. 7th, and the trees were just starting change colors. I think a couple weeks later would have been absolutely perfect. Assuming the leaves change colors at a similar time every year, I would recommend booking your trip towards the end of September, maybe even early October.
After doing this trip in the fall, I really want to do it again in the winter. I think it would be a totally different experience. Sure it would be cold, but I feel like the Trans-Siberian is meant to be experienced in the winter.
The countryside would be incredibly beautiful covered in snow, and you would have an excuse to buy one of those awesome fur hats that they seem to be selling in every city.
If you enjoy nature, Lake Baikal will definitely be one of the highlights of your Trans-Siberian journey. I think visiting the lake in the winter (when it’s frozen) would be even better than the fall when it’s just water like any other lake.
If you visit in the winter, your excursions could be way more epic! They have hover boats that will take you around the frozen lake, and you could even go dog sledding! If you live somewhere where these activities are normal, maybe you should stick to fall. But we live in Tennessee where it rarely snows, so we get super excited about the snow and everything that goes along with it.
My last argument for going in the winter is that you’re going to be eating and drinking hot things on the train, and it’s way better to eat and drink hot stuff when it’s cold outside. Each train car has a free hot water dispenser, so if you bring supplies you can have unlimited tea, coffee, and instant meals during the entire trip. It would be way more enjoyable to sip tea and coffee all day if it were freezing cold outside.
This section was obviously just a personal opinion. I think the most popular time to go is actually summer, but I really don’t understand why. I don’t see how the summer heat would make this trip any more enjoyable.
Trans-Siberian vs. Trans Mongolian
I’ll keep this section brief because we haven’t experienced the Trans-Mongolian, so we can’t do a true comparison. With that said, I think the Trans-Mongolian would be an overall better experience. During our 144 hours on the Trans Siberian, the scenery outside our window didn’t change drastically.
There was a giant lake, some mountains, small towns, big cities, and a ton of trees. So while I definitely enjoyed getting to see the countryside of Russia, I would have loved some more variation in the views, which you would get on the Trans-Mongolian.
The most beautiful section of the Trans-Siberian is the section where the tracks run beside like Baikal for a few hours. You’ll ride this section of the tracks on both the Trans-Siberian and the Trans-Mongolian. Plus, if you ride the Trans-Mongolian, you’ll also get to see the Gobi desert and the Chinese countryside.
The Trans-Mongolian turns south to Ulan Bator, the capital of Mongolia, after passing through Ulan Ude. So you could do all of the stops I mentioned in our itinerary. Plus, you’d get to stop in the capital of Mongolia and end in Beijing where you could see the Great Wall of China!
Again, I really don’t know enough about the Trans-Mongolian to speak knowledgeably on it. But I do know that you basically get to experience the best of the Trans-Siberian plus Mongolia and China on the Trans-Mongolian. So it seems like the clear winner to me.
The only thing that may stop you from choosing the Trans-Mongolian over the Trans-Siberian is what stopped us, visas. As an American citizen, you don’t need an additional visa for Mongolia, but you will need one to enter China. Chinese visas aren’t cheap and you’ll need to send your passport off to a visa service company like we did for our Russian visa.
With that said, I think the added cost and annoyance of the additional visa would be totally worth it if you have the time!
Choose your class or train
After you’ve chosen your route, it’s time to choose which class of ticket you’ll book for the trip. Your options include 1st, 2nd, or 3rd class.
The biggest difference between each class of service is the number of people who share a cabin. In first class, there are only two people in a cabin. In second class there are four people, and in third class there are no cabins. Instead, there are 50 people in the train car, and all of the beds are open to the rest of the car.
If you want a tour of a first class cabin, watch this video [starting at 6:45]
If you want a tour of a third class cabin, watch this video [Starting at 7:40]
We didn’t stay in a second-class cabin, but you can catch a glimpse of one at 1:22 in the video below. They look similar to the first class cabin except there are four beds instead of two.
One important (and possibly obvious) thing to point out is that unless you’re riding the Trans-Siberian without stopping, you’ll be on different trains during each segment of your journey.
After you get off your train at your first stop, that train will continue to its final destination, and you will be catching a different train a few days later whenever you decide to leave.
So you don’t have to choose one class of service for the entire journey because you’ll technically be booking separate tickets for each segment.
For example, Kara and I booked first class for our 74-hour journey from Moscow to Irkutsk. We booked 3rd class for our second segment because it was only 6 1/2 hours from Irkutsk to Ulan-Ude, and we booked first class again for our 64-hour journey from Ulan-Ude to Vladivostok.
Hopefully, you now have a decent understanding of your booking options. Now let’s look at how you actually purchase these tickets.
Buying Tickets
There are two different ways you can buy tickets for the train. You can buy your tickets through one of many online brokers, or you can buy them directly from the train company through their website.
Buying through a broker is easier but more expensive while buying from the train company’s website is more confusing, but substantially cheaper.
If you buy through a broker, you’re basically paying someone to guide you through the purchasing process. To be fair, booking through the train website can be confusing. However, you’ll pay quite a bit of money for this middleman service, and the fees from each broker vary considerably.
If you decide to go through a broker, I’ve heard that TuTu has some of the lowest fees.
One of the most popular online brokers is RealRussia.com. Their site has a great tool for planning your trip. You can put in where you want to stop and how many days you want to spend at each stop. Then, the website will show you all of the available trains for each segment of your journey.
I was super close to purchasing my tickets from RealRussia.com. However, right before I was going to purchase the tickets I discovered that the official Russian train website has an English version that I could use to purchase tickets!
So, I compared the prices between RealRussia.com and the train company’s website, and I was shocked to learn that the exact same tickets on RealRussia.com were marked-up over $300 EACH!
Even though the train company’s website was more confusing, I booked the tickets that way and saved over $600!
My advice would be to do as I did (on accident). Use RealRussia.com’s online tool to plan your journey. Then, buy your tickets directly from the train company’s website.
One important thing to note: If you ride the Trans-Siberian all the way across, you will transit through 5 time zones. This makes planning your journey a bit more challenging. Thankfully, RealRussia.com takes the time change into consideration on their online planning tool. When you are planning your trip on their website, it will give you all of the times in local times. However, when you search for tickets on the train company’s website, all of the times will be listed as Moscow time.
Pretty much everything that has to do with trains is listed in Moscow time. For example, the clocks on the trains stay on Moscow time. The clocks at each train station are on Moscow. The schedules both on the trains and at the train stations are listed in Moscow time.
To make sure that you’re booking the same tickets on the train company’s website as you found on RealRussia.com, it’s helpful to use an online time converter such as TimeZoneConverter.com
Searching for Trans-Siberian Tickets on RealRussia.com
Below I’m going to show you exactly how to search for your route on RealRussia.com. Then, I’ll show you how to actually book the tickets on the train company’s website.
You can start planning your journey on RealRussia.com by following these four easy steps.
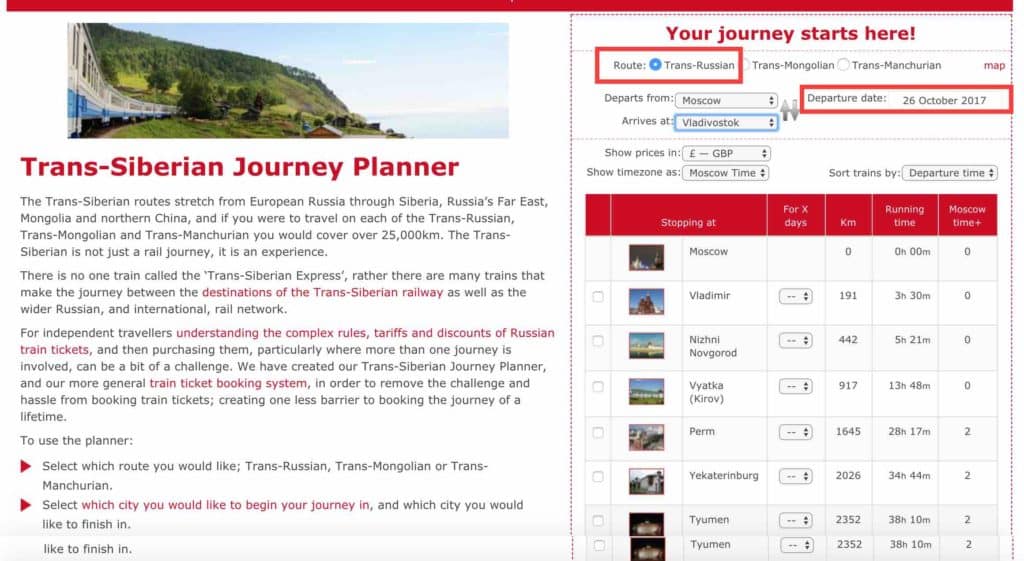
Step 1: Select “Trans-Russia” at the top of the journey planner and enter your estimated departure date.
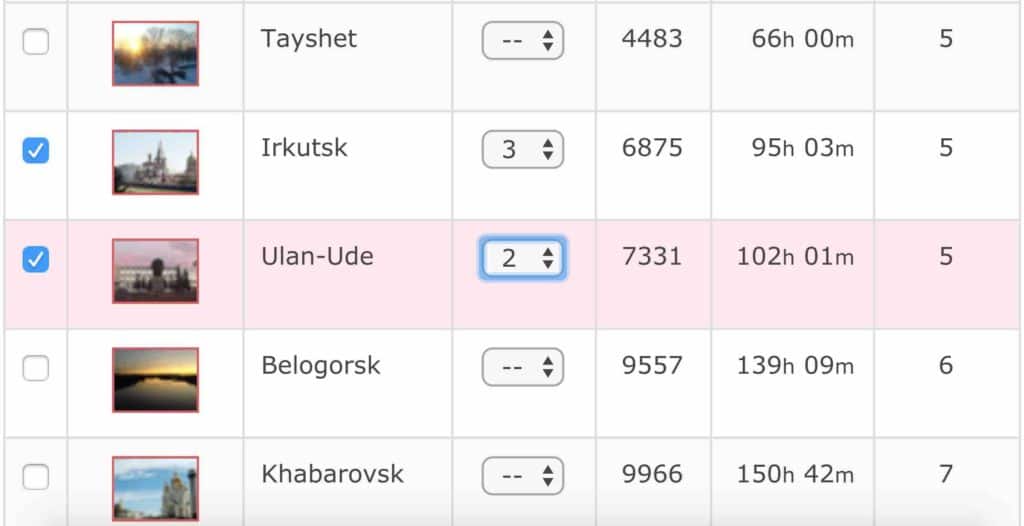
Step 2: At this point, you should see all of the possible stops along the Trans-Siberian listed in the journey planner. Select each city you want to visit and specify how long your stay will be using the drop-down menu. Once you have entered your selection click “search for available trains”
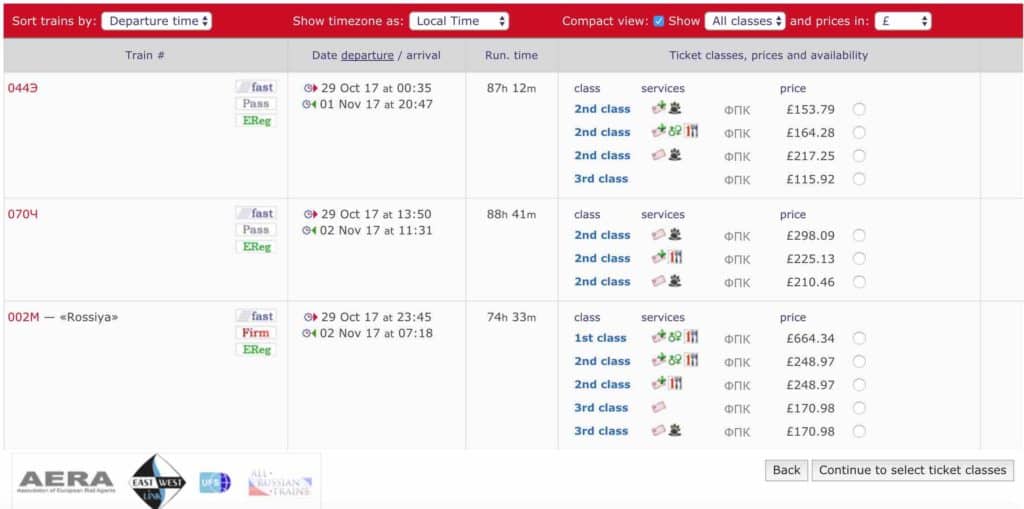
Step 3: On the next page you’ll see all of the trains that are available for the first segment of your journey. This is where you have the opportunity to choose which train you want to take, and which class of service you want to choose. Repeat this step for every leg of the journey.
Step 4: Once you have entered your train selection for each leg of the journey, you’ll be presented with your “journey summary”. You’ll also be given the opportunity to purchase your tickets. I recommend not purchasing your tickets through Real Russia because you’ll pay a premium for using their service. Instead, you should record all of the details in your journey summary and book your tickets on the train company’s website.
Buying Trans-Siberian Tickets Through Rzd.ru (English version)
Now I’ll show you how to save a substantial amount of money by booking your train tickets on the English version of the rzd.ru website.
Step 1: In order to buy tickets on the website, you must create an account. It doesn’t take long, it’s pretty straightforward, and it’s free. You can click here to get started creating your account.
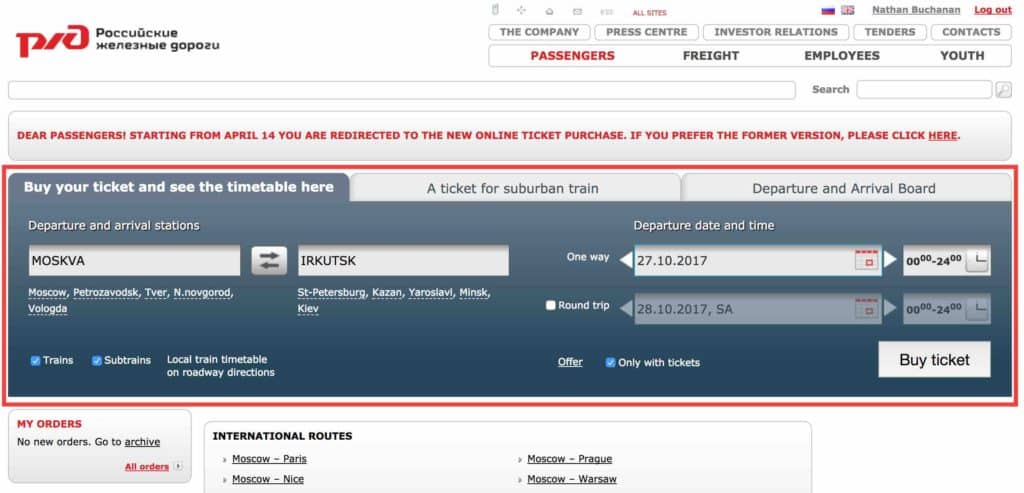
Step 2: Once your account has been created, you’re ready to start booking your tickets. You’ll need to book each leg of your journey separately, so start by entering the origin and destination of the first leg of your trip. Make sure to refer back to your journey summary from Real Russia and enter the appropriate dates. At this point, you don’t need to worry about the time. You will have the option to select your time and class of service on the next page.
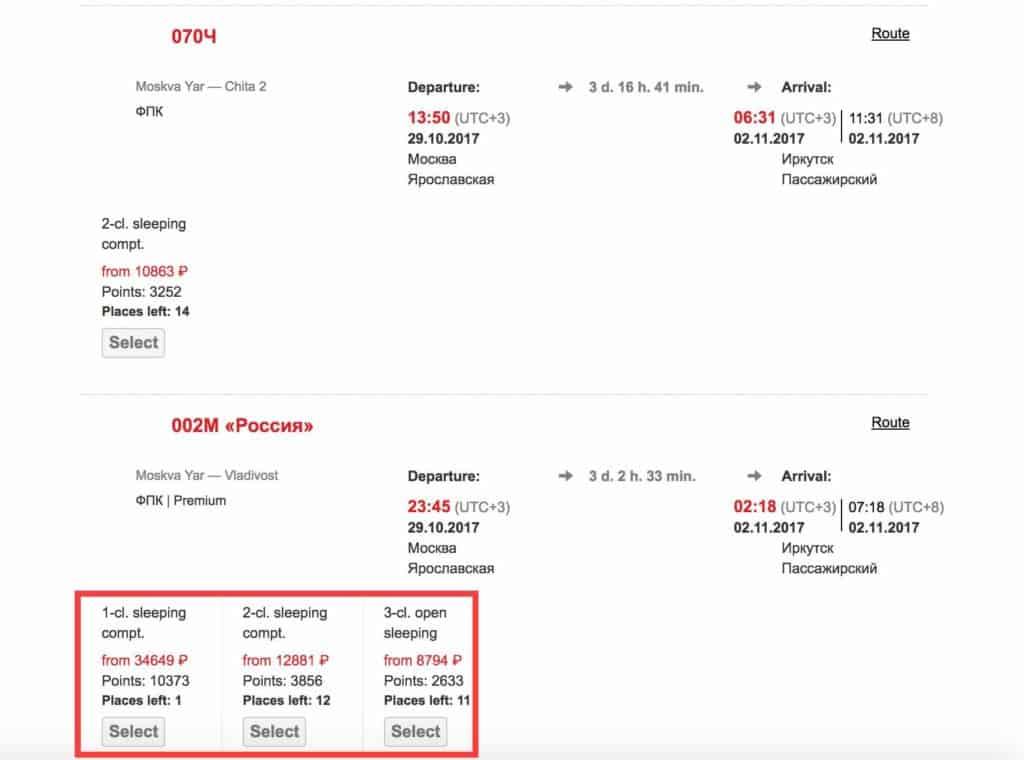
Step 3: On this page, you’ll be presented with all of the available trains on the day you chose. Refer back to your summary from Real Russia and choose the train that matches the journey you created. You need to be especially careful about the times on this step. The times on the rzd.ru website will all be listed in Moscow time, and the times on your journey summary will be listed in local time. Make sure to convert the times to ensure you’re booking the exact train you wanted on your original itinerary.
Step 4: After you’ve selected your class of service, you’ll need to choose a compartment. Once you’ve chosen a compartment, you’ll be presented with a seat map of the compartment. The seat numbers that are already taken will be grey, and the ones that are still available will be black. I recommend looking for a compartment that has open seats near the middle. I would especially avoid booking seat in the compartment next to the toilet. After you’ve found a suitable compartment, click “Go to Passenger Data Entry and Seat Selection”.
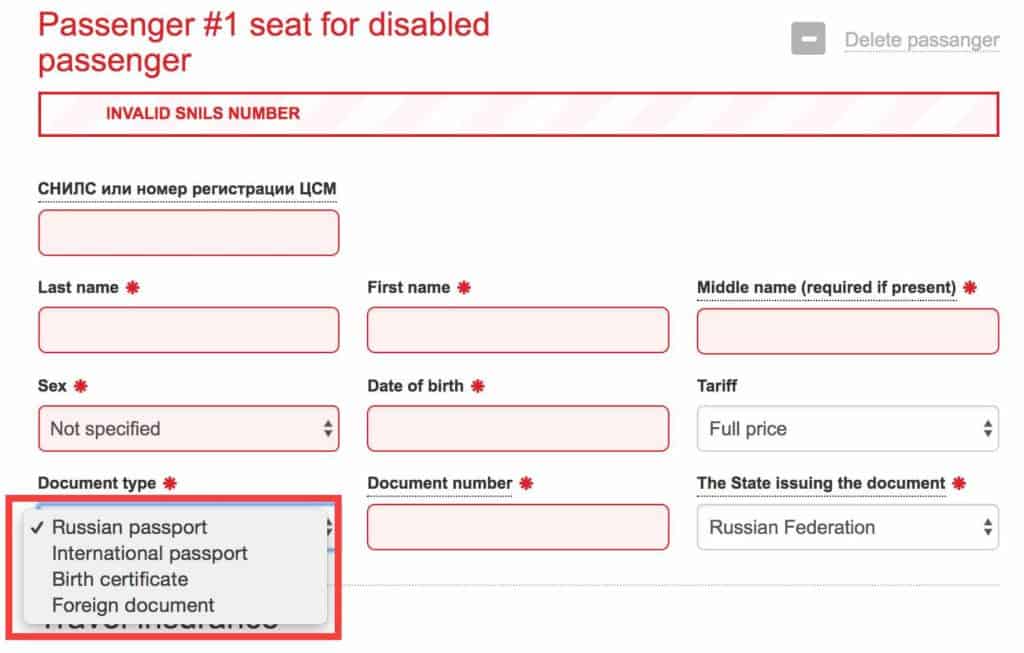
Step 5: Once you’ve chosen your compact, the next step is to fill in your personal information and choose your seat. Filling in your personal information is pretty straightforward, but there is one tricky part. When you are choosing your “Document Type” DO NOT select Foreign Passport. Instead, you should choose “Foreign Document”. You’ll still enter your passport information as usual, but for some reason, the site only works if you choose “Foreign Document”.
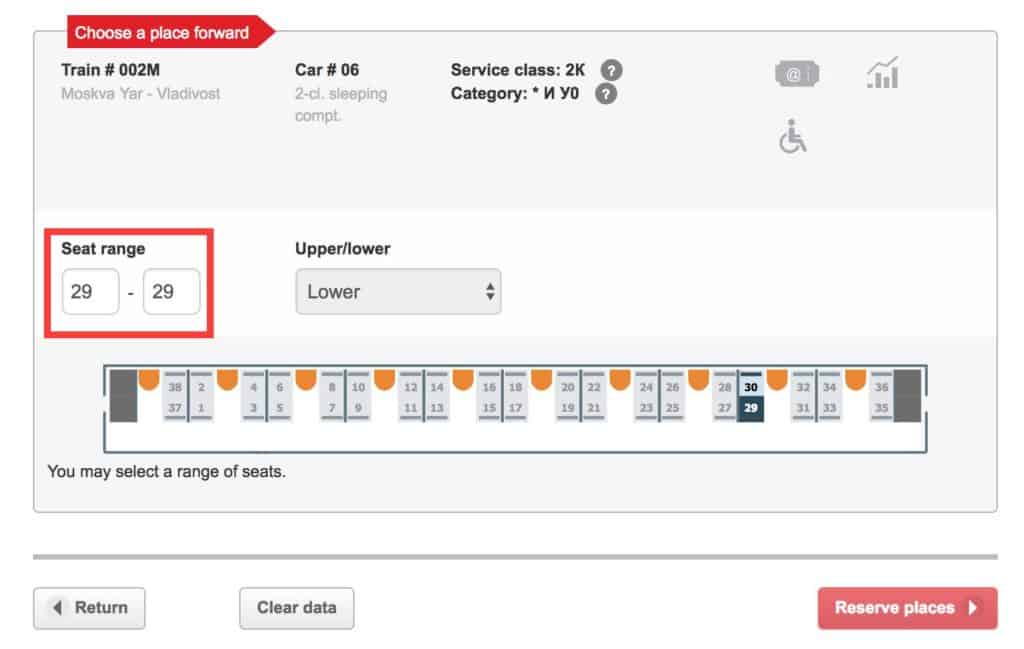
Next, choose your seat. If you would like a specific seat, just enter the seat number in both boxes of the seat range. In the example below I have chosen seat 29. After you’ve selected your seat click “reserve places” and you’ll be taken to the payment page.
Step 6: Purchase your ticket. This step should be pretty straightforward! The only thing you should know is that most U.S. banks tend to block purchases from Russia unless you have notified them ahead of time. I recommend calling your bank to let them know that you’ll be purchasing from Russia so they don’t block the transaction.
Step 7: Repeat this process for each leg of your journey.
Purchasing your tickets through the RZD website is a little extra work compared to purchasing your tickets on Real Russia, but with this guide you shouldn’t have any issues, and you will save a lot of money!
Packing
Now that you have your tickets booked, it’s time to think about what you’ll pack. This isn’t going to be a comprehensive packing guide because what you pack will depend on the season you ride the train and your personal preference.
Instead of a comprehensive list, I’ll give you some overarching guidelines and a few essentials you should definitely pack regardless of the season.
My biggest piece of advice when packing for the Trans-Siberian would be not to pack too much! Especially if you plan to travel in second or third class. If you’re traveling in first class you’ll have a little more storage space, but either way, the less you can pack the better.
In second and third class you’ll only have one storage compartment under or above your bunk depending on if you choose the top or bottom bunk. The space is big enough for two carry-on sized suitcases. In our case, we were able to fit our carry-on bag and backpack under the seat with plenty of room to spare.
It’s important that you don’t pack in a big suitcase otherwise it won’t fit in the storage compartment. I would recommend packing in a carry-on size bag, or an unstructured duffle bag that you can cram into small spaces.
Another important thing you should take into consideration is that you don’t need new clothes for every day you’re on the train. You’re pretty much just laying in your bed all day. There’s no reason to get dressed up or even change clothes from day to day. You probably won’t have the opportunity to shower anyway. So one or two pairs of comfortable clothes for your days on the train should be plenty!
Now let’s talk about the items that are worthy of taking up precious space in your carry-on sized bag.
- Shoes – You’ll want to make sure that you have a pair of shoes for the train that are easy to slip on and off. You’ll probably want to take your shoes off when you’re inside your cabin, and you won’t want to walk around the train without shoes on, so you’ll do a lot of taking your shoes on and off. Comfortable slip-on shoes are essential!
- Lounge clothes – You don’t need to look nice when riding the train. As I said before, you’ll be sitting on your bed for most of the day so make sure to pack comfy clothes!
- A Bag Lock – If you’re riding in first class you won’t need one, but you’ll definitely want to be able to lock up your stuff when you leave the train and sleep if you’re sharing a space in second or third class.
- Body wipes – Kara used wipes to freshen up every morning. She basically just used wipes to clean her whole body. She calls it a wipey bath.
- Dry Shampoo – Kara says it keeps your hair from getting greasy and it gives it more body. Which I guess is what you need if you’re not showering for a few days.
- Converter & Power strip – Unless your electronics have European plugs, you’ll need a converter. If you ride in first class you’ll probably only have one outlet in your cabin. So if you want to charge more than one thing at a time, a travel power strip will come in super handy! If you ride in 2nd or 3rd you’ll have to share an outlet with a lot of people, so you can easily make friends by having a power strip that other people can use!
- Audiobooks and Podcasts – I recommend audiobooks and podcasts over books or a kindle because you can enjoy the scenery while listening. If you spend your whole trip with your head in a book, you’ll miss the best part, the views. CLICK HERE to get your first audiobook for free on Audible!
- Stuff for Sleeping Better – Melatonin/Eye Mask/Ear Plugs/Head Phones – If you have trouble sleeping, the items listed above may make it a little easier for you to sleep on a bed that is constantly moving and in a room that never quite gets all the way dark or quiet.
I think that about does it for my packing tips and necessities. Obviously, you’ll need to take into consideration what excursions you have planned when you’re off the train to complete your own packing list.
Grocery List
When it comes to eating on the train you have four options.
Option #1: You can buy food from the restaurant car on the train. The restaurant is the only place you’ll be able to get a proper meal while riding the Trans-Siberian. However, it won’t be cheap. We only ate in the restaurant once on our trip. A small bowl of soup and a small plate of fried potatoes cost us over $10. If you want a proper meal it will cost between $10 & $20 per person. The prices aren’t crazy expensive, but the cost of food would really add up if you ate every meal in the food car.
Option #2: You can buy snacks, drinks, and instant meals from your cabin attendant. The lady in charge of your car has a small supply of food that she’ll be happy to sell you at a premium. You’ll pay double what you would pay for the same thing in the grocery store. However, most of what they sell in the cabin is cheap so you’ll be paying $1 for your instant ramen noodles instead of $0.50. So, it’s really not a big deal.
Option #3: You can buy snacks, drinks, and instant meals at the train stops. The train will stop 3 – 5 times per day. You’ll have a few minutes to jump off and buy a few things. The stuff at the train station is cheaper than what you’d buy on the train, but still more expensive than the grocery store. If you don’t want to go grocery shopping before the trip, this is probably your best bet for purchasing food. At some of the stops, there will also be ladies selling home cooked food like dumpings and some sort of fried bread. However, I’ve heard they’re putting a stop to this because a lot of people were getting sick from the food.
Option #4: Bring your own food. This is the option we chose, and in our opinion, it was the right decision. It’s definitely the cheapest. Before each long leg of our trip we went to the grocery store and stocked up on all of the food we’d need for the next few days. Since there is unlimited hot water on the train, everything we bought could either be cooked with hot water, or didn’t need to be cooked at all. Also, there are no refrigerators on the train, so don’t buy anything that needs to be refrigerated.
Below is a list of foods I’d recommend picking up at the store before getting on the train.
- Ramen Noodles
- Instant Coffee
- Tea
- Chips
- Instant Oatmeal
- Instant Mashed Potatoes
- Plastic Cutlery
- Fruit
- Veggies
A normal day of eating on the train for us started with oatmeal and an apple for breakfast, instant potatoes for lunch, and ramen noodles for dinner. We also consumed way too much coffee, tea, and snacks on a daily basis. To be fair, our diet wasn’t healthy, but it was cheap and easy!
The optimal eating solution would probably be to have a balance between bringing your own food and eating in the restaurant car. For example, you could bring enough instant food for breakfast and lunch each day. Then, you could treat yourself to dinner each night in the restaurant cabin. How you decide to handle the food situation really depends on your personal preference and your budget. If you want to spend the least amount of money, bring your own food! If you consider eating the local food part of your travel experience, you should have at least a couple meals in the restaurant car.
What daily life is like on the Trans-Siberian
If you want to see what life is like when riding the Trans-Siberian Railway, I highly recommend watching a few of our videos. We documented almost every day of our 11 day journey. Click the play button below to binge-watch the series.